(c) Costume Inventory Resources, 2018 The Music Dept. Inventory Database and the User Guide are products of Costume / Uniform Inventory Resources www.costumeinventory.com
Checkouts
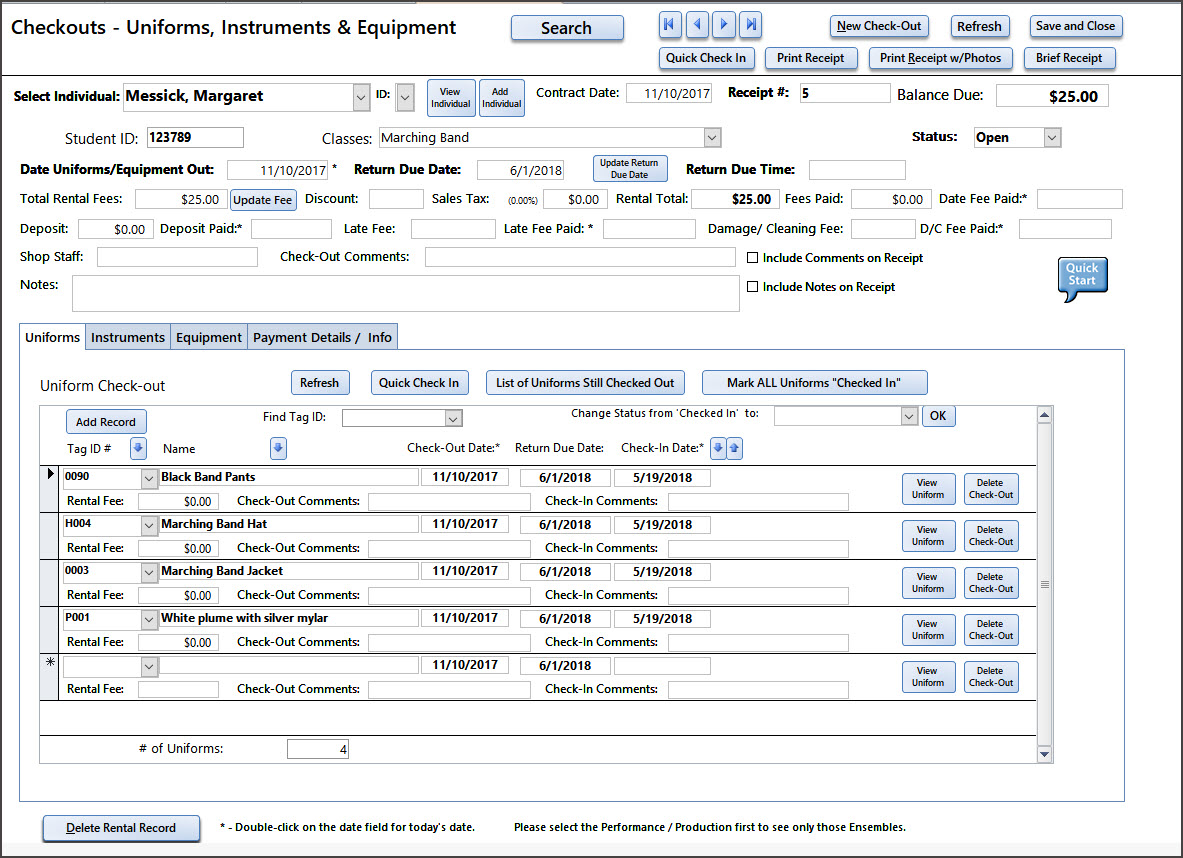
Checkouts (or Rentals)
You can also change the wording on this form to not say "Receipt" but any word you choose (Contract, Invoice, etc.). Go to the Checkout-Utilities to see how to change the wording.
Receipts:
There are many 3 types of receipts that can be printed -
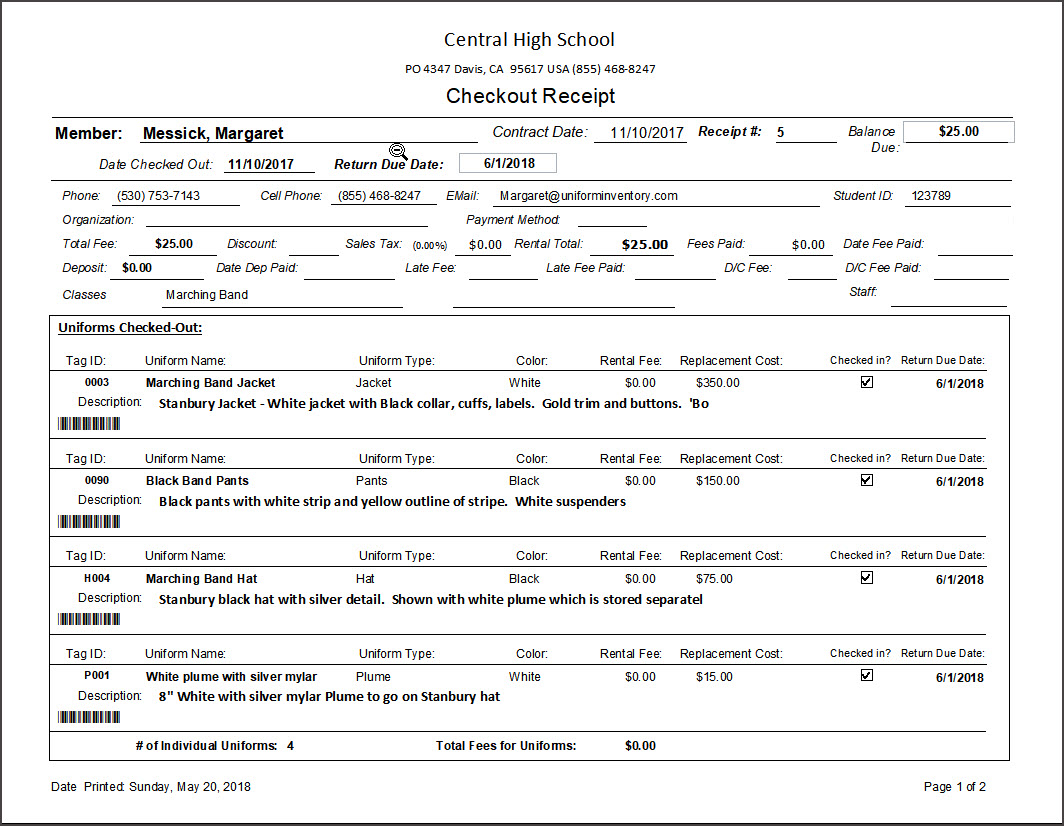
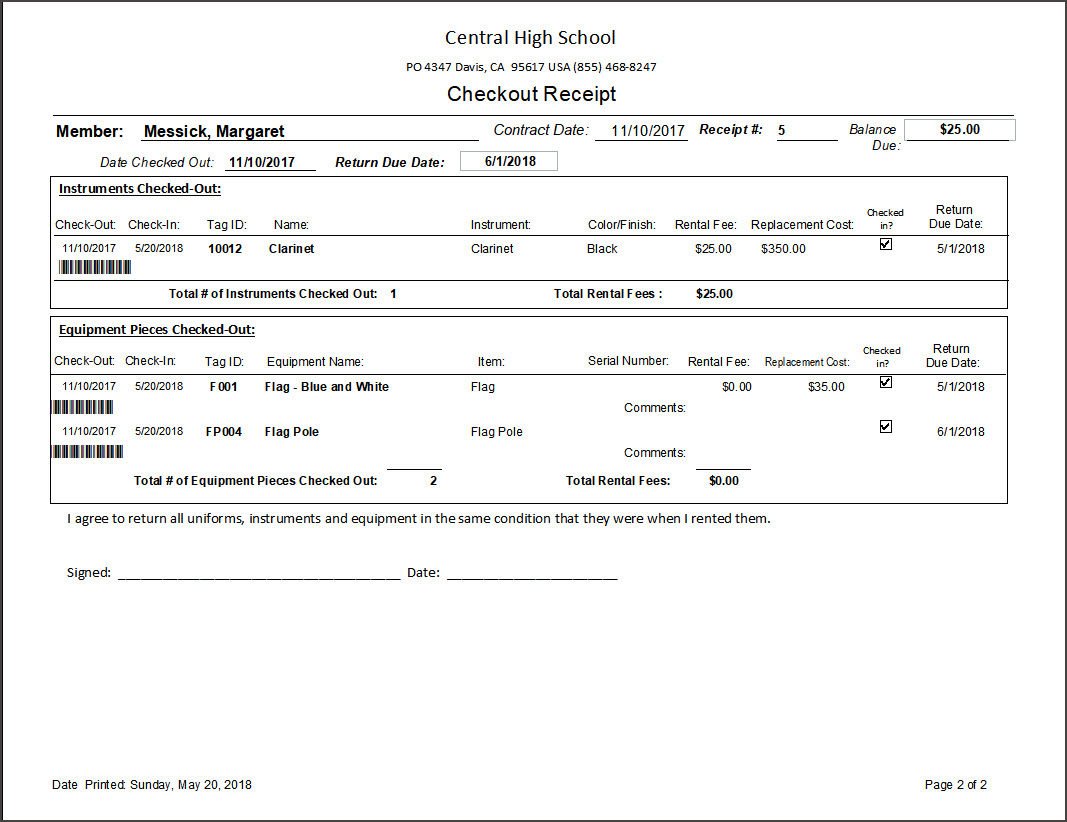
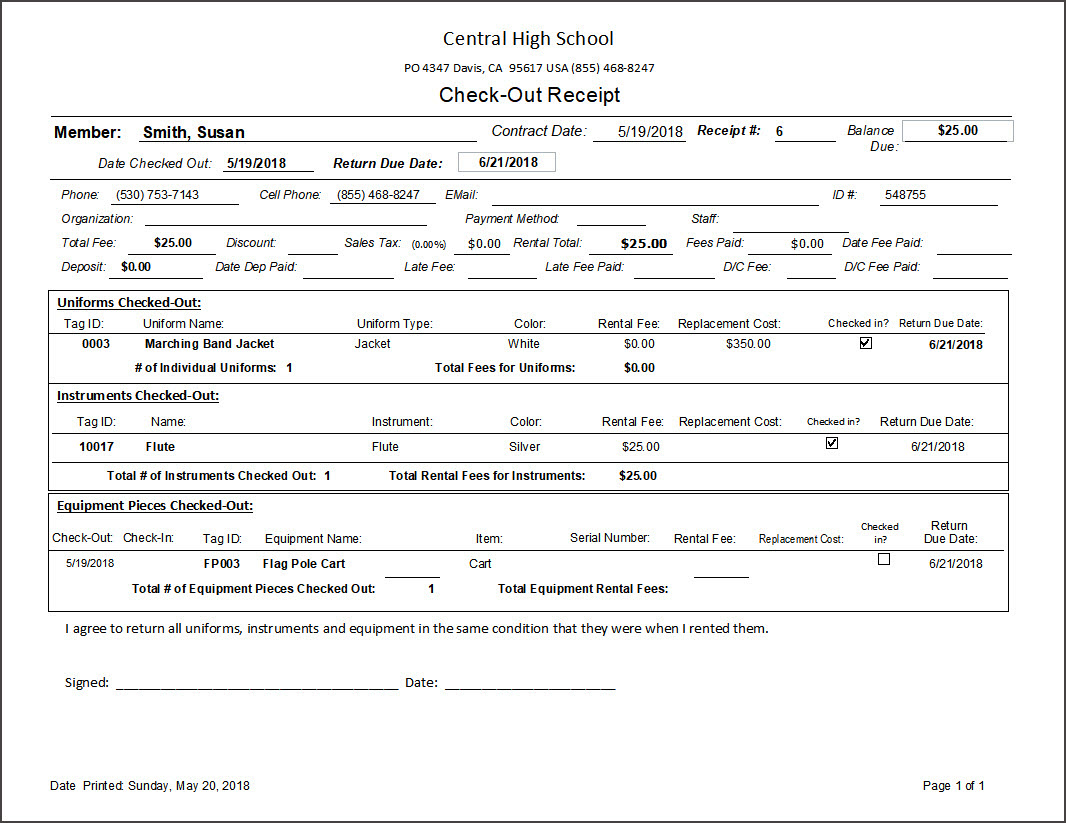
Receipt (no photos) This report has 2 lines of details for each item checked out. It includes a barcode that can be scanned to use for the Quick Check-in. Often, a checkout receipt will go to more than 1 page. Look for the page numbers at the bottom right edge. The totals for each type of item (Uniforms, Instruments, Equipment) are at the bottom of each section.
Page 2:
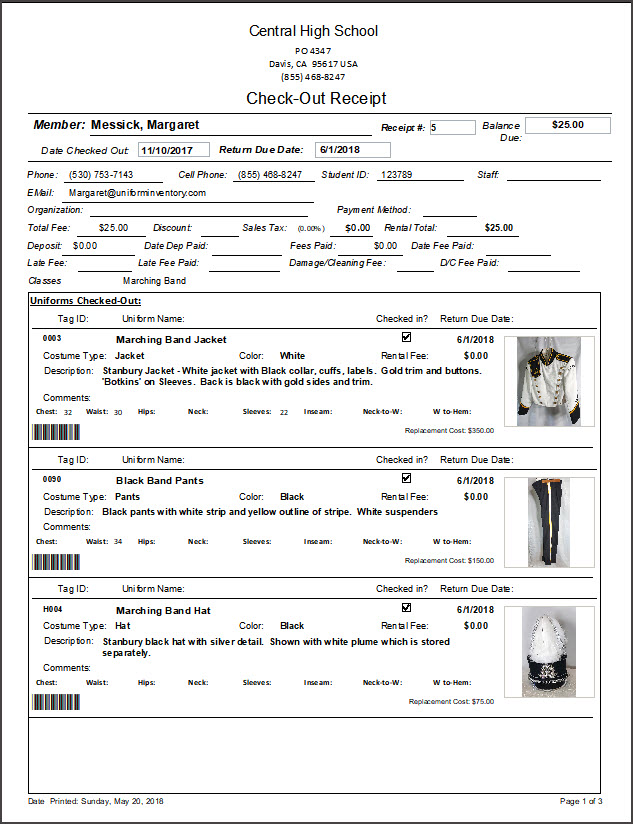
Receipt with Photos - If you want to include photos of each item - use this report. This report is often more than one page. (Only page 1 is shown here but the receipt is 3 pages long.)
The receipt title (Checkout Receipt) can also be changed. A barcode of the Receipt# can be printed in the upper right corner. See the Checkout Utilities menu.
You can also choose in include your school logo in the upper left corner.
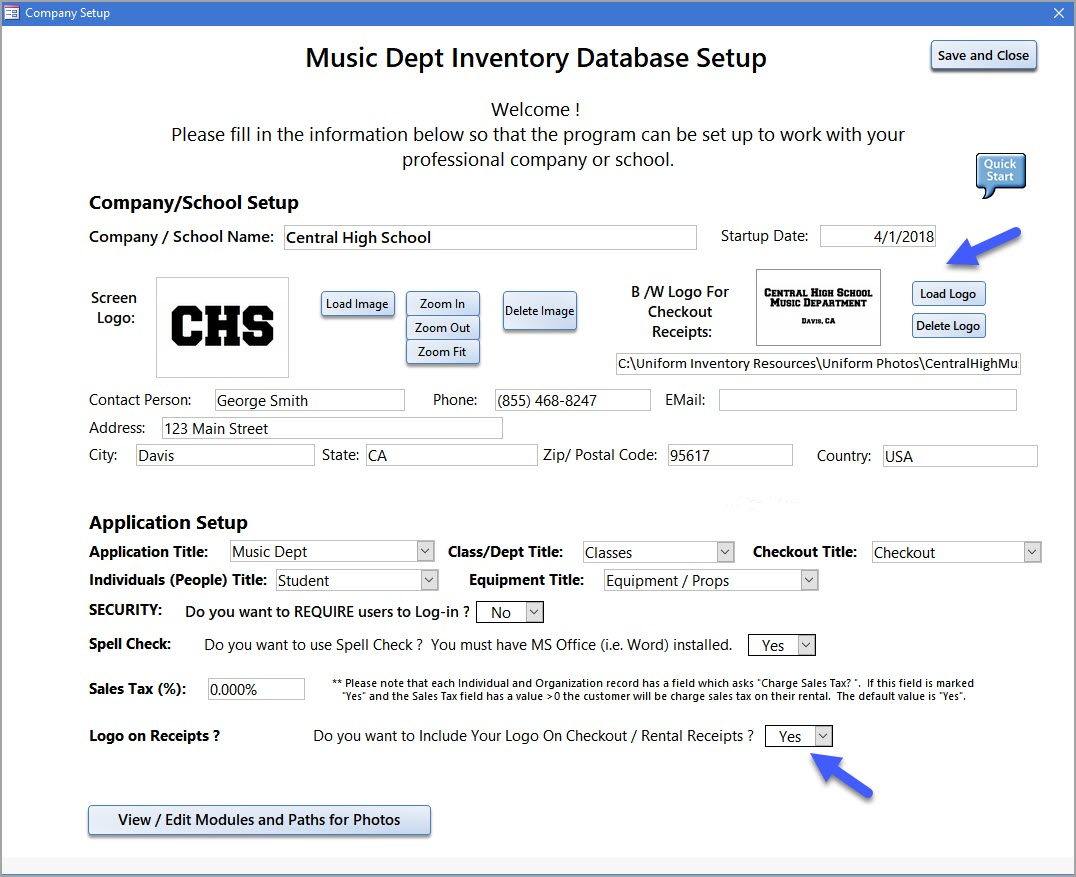
Add Logo to Checkout / Rental Receipts - You can now add a 2nd logo to the Company Setup screen that will print on the Checkout / Rental Receipts. The logo on the left is for the data entry screens and main menu. The logo on the right is for Checkout / Rental Receipts/reports.
a) At the bottom on the screen - select "Yes" for the' Logo in Receipts' question.
b) Click on the "Load Logo" button to link the image to the database. Note - this is a linked image. If the logo file is moved or renamed - it won't be found to print on the receipt. Please use a black and white *.jpg or *.png file.