Company / Setup Information
These Utilities are for setting up preferences in the database.
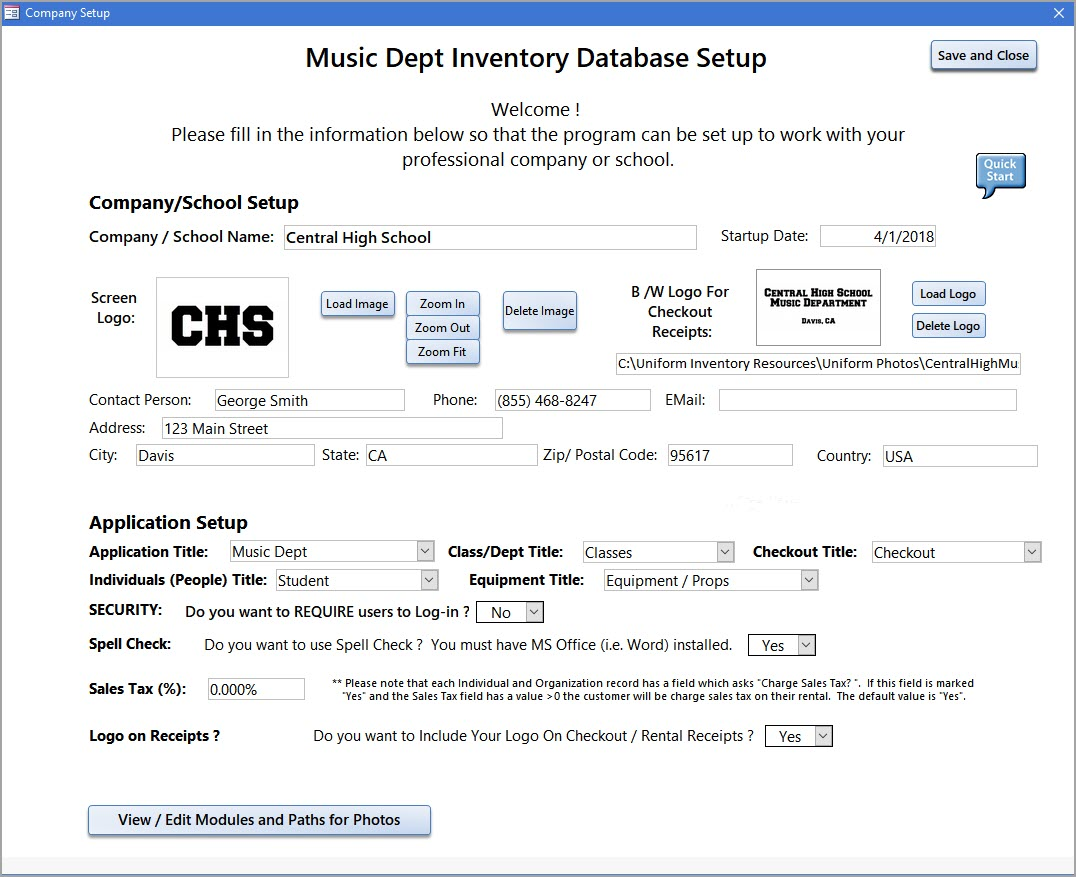
Company Information - you can enter details about your school / band or company. You can also select the titles for the database, the performers, the checkouts, etc.
1) The Company/School Name is not required but the program will ask for each time until something is filled in.
2) Screen Logo - this is optional but if you would like it to appear on the main menu you can load a *.jpg or *.png file. B&W Logo for Checkout Receipts: This is a logo that you can print on the checkout receipts. Be sure to check the box at the bottom "Do you want to include you logo on Checkout Receipts? " See an example of the receipt with the logo here:
3) Contact Name - this is good to have in case someone wants to get in touch with someone about the database.
4) Address - If you rent/checkout any uniforms or equipment you will want to print out a receipt. The Company/School Name, Address, City/State will appear at the top of the receipt - which is helpful to the person checking the items out.
5) Application Setup:
a. Titles - You can change the title of the Application (from Music Dept to something else). There is a list of possible options (Uniform Inventory Database, School Inventory, etc). If none of these are what you want you can go back to the main Utilities Menu and look for the Applications Titles options. You can add a title to the list and return to this screen to select it.
b. Security - See this section to learn more about requiring users to log-in to use the database. You can set up different access levels (Administrator, Data Entry and Read-only) for different users.
c. Spell Check - If you have the full version of MS Office you can have a Spell Check feature turned on. Once turned on you will see a little Spell Check button at the top of the Uniforms, Instruments, etc screens.
The program will stop at a word it doesn't know and offer suggestions. You can add words to the dictionary.
d. Sales Tax: If you charge sales tax on rentals you can set the % here. If no sales tax is required, leave it a 0.
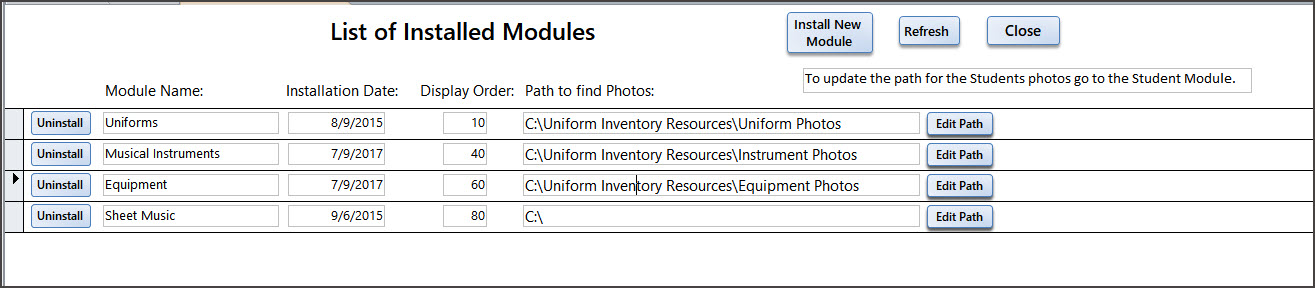
6) View / Edit Modules and Paths for Photos - this is a short cut to the Main Menu option of the same name. - See below.
View List of Installed Modules - this screen allows you to un-install or re-install modules - Uniforms, Musical Instruments, Equipment and Sheet Music.
To Uninstall a modules - such as Sheet Music, click on the "Unistall" button. You will be asked to confirm the un-install. Any data entered in the module will be kept. This just removes it from the Main Menu.
To add a module back - click on the "Install New Module" and pick the module you want off the list.
The "Path to Find Photos" is the path where all the photos are stored for the database records. It is a good idea to put the path/folder name here so when you are adding photos to records the program will know where to look for them.
If you have any questions on adding or uninstalling a module - please contact us at Costume/Uniform Inventory Resources.