New Features for version 8-7
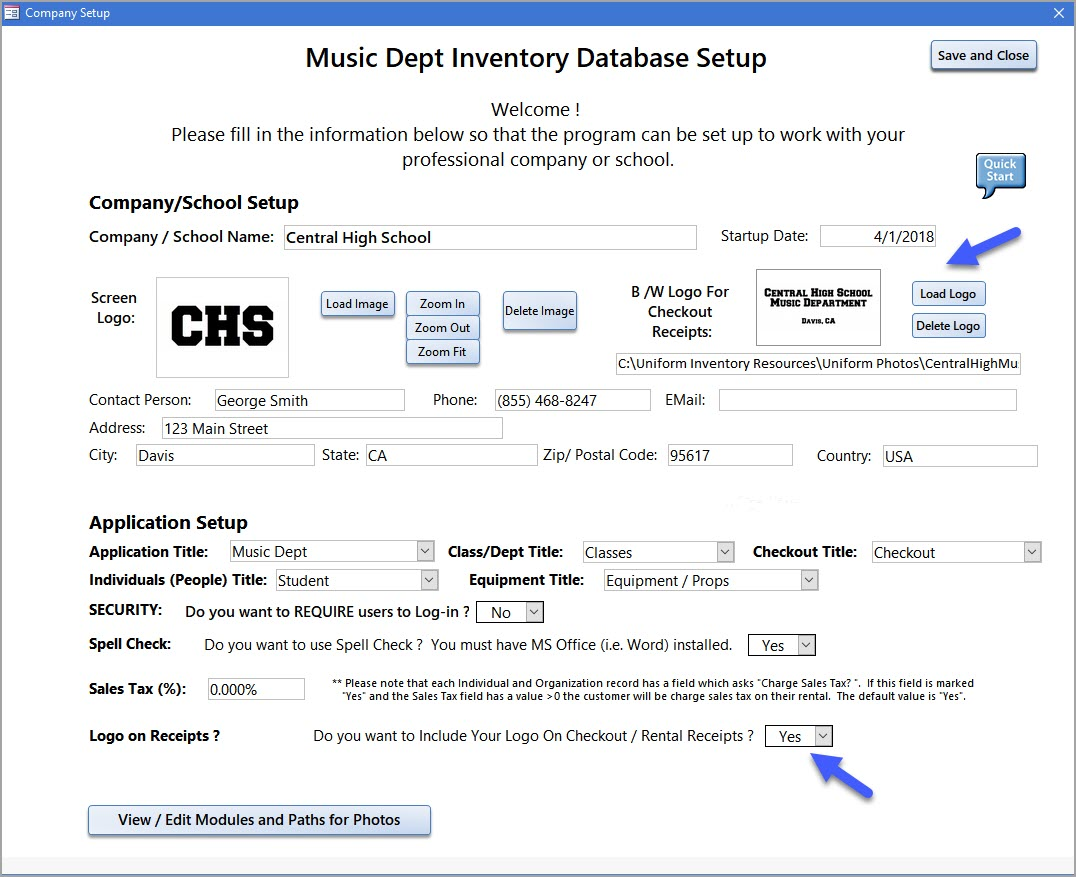
1) Add Logo to Checkout / Rental Receipts - You can now add a 2nd logo to the Company Setup screen that will print on the Checkout / Rental Receipts. The logo on the left is for the data entry screens and main menu. The logo on the right is for Checkout / Rental Receipts/reports.
a) At the bottom on the screen - select "Yes" for the' Logo in Receipts' question.
b) Click on the "Load Logo" button to link the image to the database. Note - this is a linked image. If the logo file is moved or renamed - it won't be found to print on the receipt. Please use a black and white *.jpg or *.png file.
2) Select the wording for the Check-out Receipts.
You may now change the text of the word "Receipt" on the screen and printouts from the Checkout / Rental screens.
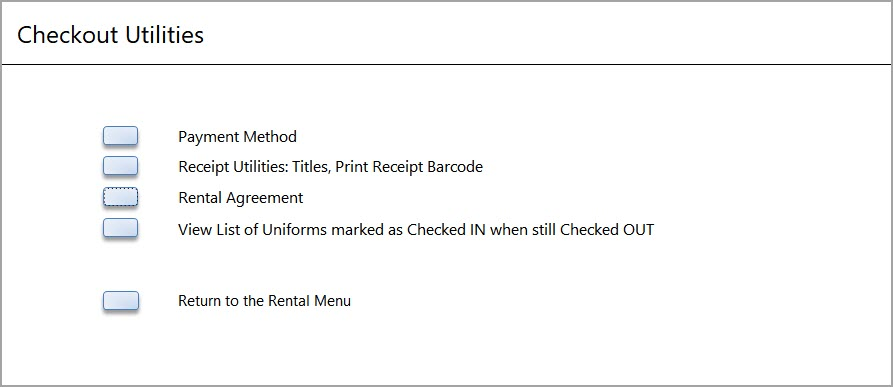
a) Go to the Rentals / Utilities Menu
b) Select Receipt Utilities - Titles, Print Receipt Barcode
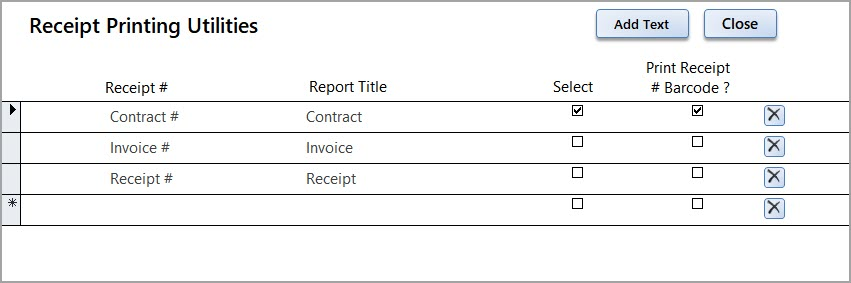
c) On this screen you can select one of the options or add your own.
For the wording on the Checkout screen - select the word you want to use instead of "Receipt #".
For the wording on the Checkout reports - enter the word for the Report Title.
If you want to have a barcode for the Receipt # print in the upper right corner of the printout (so you can find the checkout record quickly when someone comes in to check things back in), click on the checkbox.
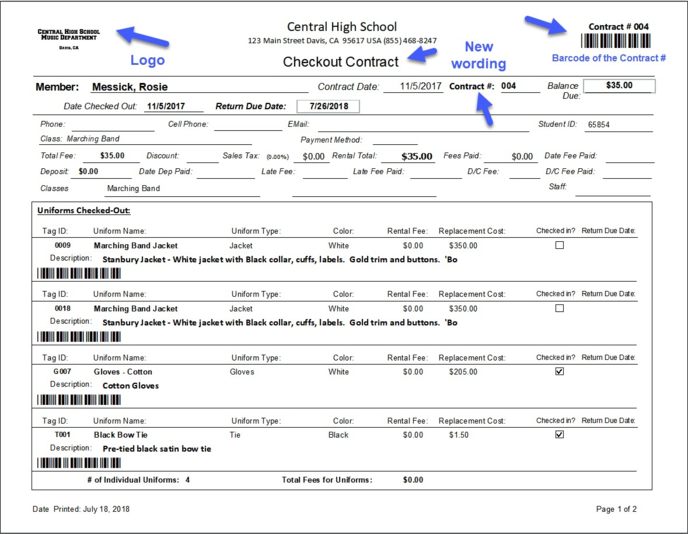
Here is a sample of the new checkout 'receipt' file using the titles of "Contract"
3) Sheet Music Module has new features - see the Sheet Music section for more details
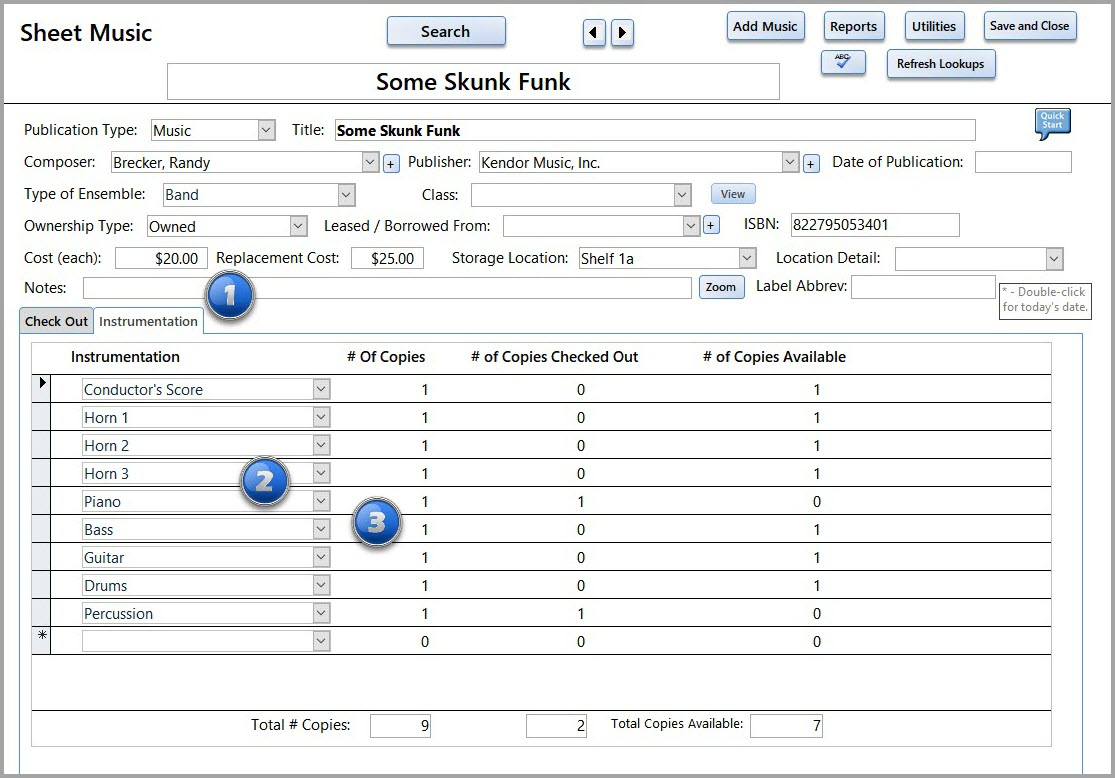
a) A new tab has been added for Instrumentation. You can list all the Instrumentation and the number of copies of each part. As copies are checked out the "# of Copies Checked Out" and "# of Copies Available" will be updated.
1 - Select the Instrumentation tag
2 - Select the Instrumentation part from the drop-down list. If the part you need isn't listed - go to the Utilities Menu and add the part and return to this screen. Remember to click on the "Refresh Lookups" button when you return.
3 - Enter in the number of copies you have for the selected part
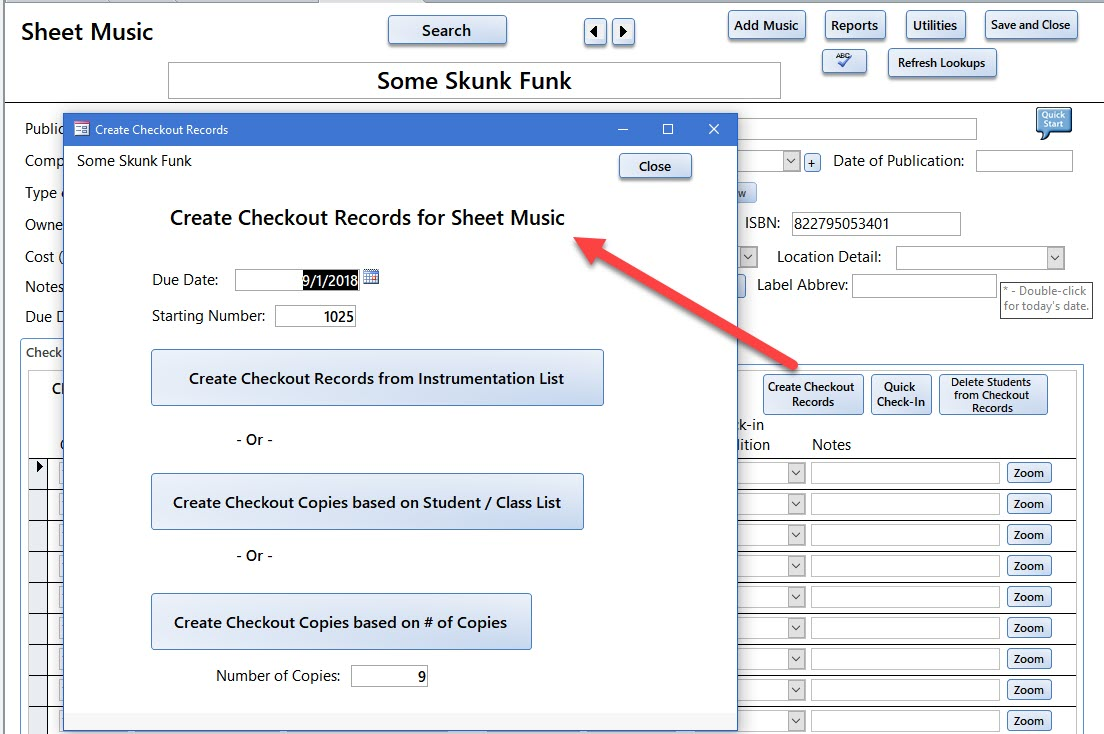
b) Create Checkout Records - 3 ways
1) Enter the Due Date when the music is to be returned.
2) Enter the Starting Number for the barcode. The starting number can be any 3 or more digit (i.e. 001, 1001, etc) number. This allows you to check in the music with the barcode scanner.
3) There are 3 choices to create the records:
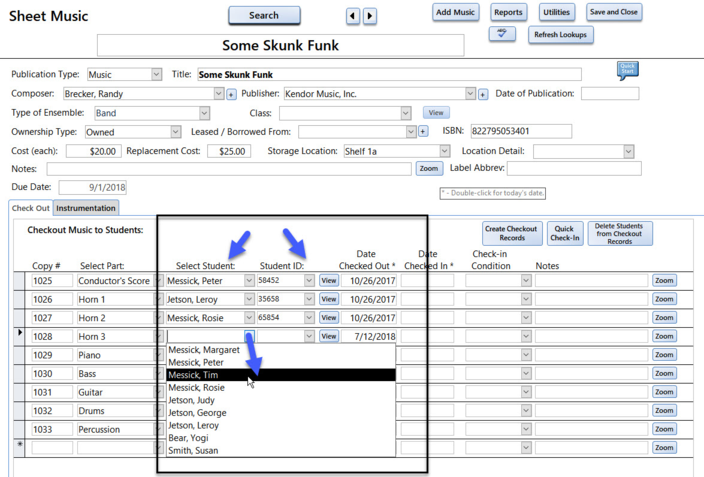
a) Create a checkout record for each copy of the instrumentation - the program will make one check-out record for each part. In the case of the Some Skunk Funk (above example) it will create 9 records and fill in the Instrumentation field.
b) Create a checkout records for each student that is assigned to the class. (The Class is listed at the top of the screen.) If you have already created a student record for each student and assigned them to class and the class is assigned to this piece of music - the program will create a checkout record for each student. You will need to assign the instrumentation to each record.
c) Create records based on the number of copies you enter. The program will create records based on the number of copies you have entered. You will need to enter both the Instrumentation and the Student/Performer Name to each record.
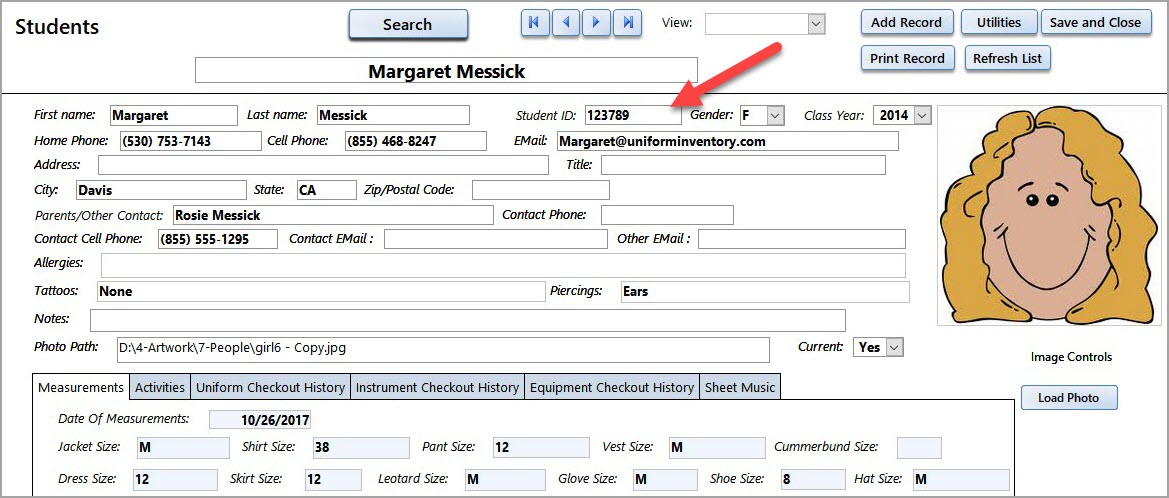
4) If you have not created a record for each student - Create a record for each student / performer in the Students section of the database. Enter as much or as little contact information as you want. Once their record is created and they have checked out music you can see a list of what they have on their record.
5) Assign a student to a copy record by selecting the student name or ID (if the ID is listed in the student record.)
6) Print out a list of the Check-out records from the Report Menu.
c) New Reports for Sheet Music
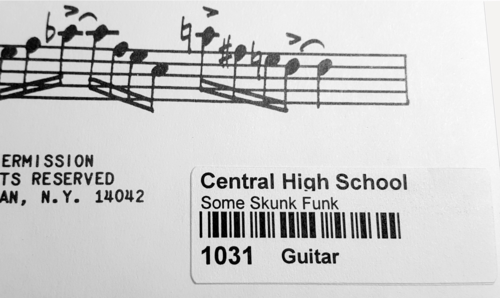
1 - The ID Labels for the sheet music have been updated. Once you create the Checkout records you can print a label for each copy of music.
The ID Labels (from the Reports Menu) are designed for you to print on your own printer with the name of your school/organization, the title (or title abbreviation), a barcode and the copy number. You can print them on Avery Label # 5195 / 61533 (2/3" x 1 3/4" labels) that are available from most office supply stores. They are easy to read and the barcode can be scanned when the music is brought back to be checked in.
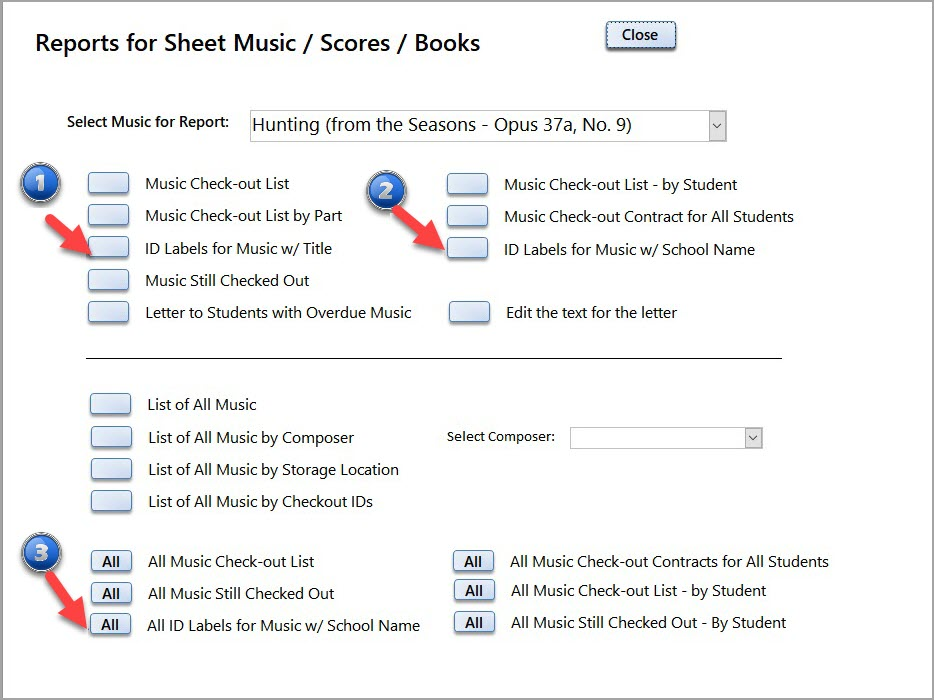
There are 3 options to printing the ID Labels.
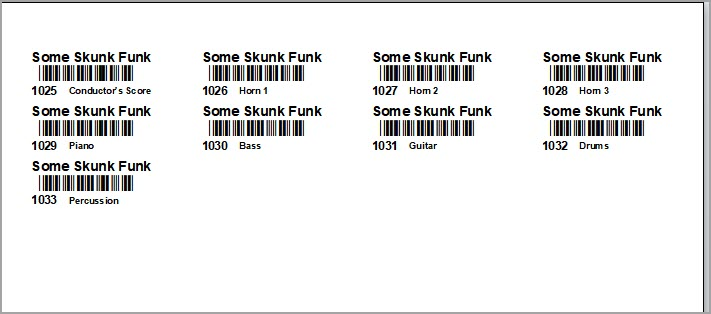
1) Print a label with the Title and instrumentation and Copy number - for the Selected Title (in the box at the top of the screen)
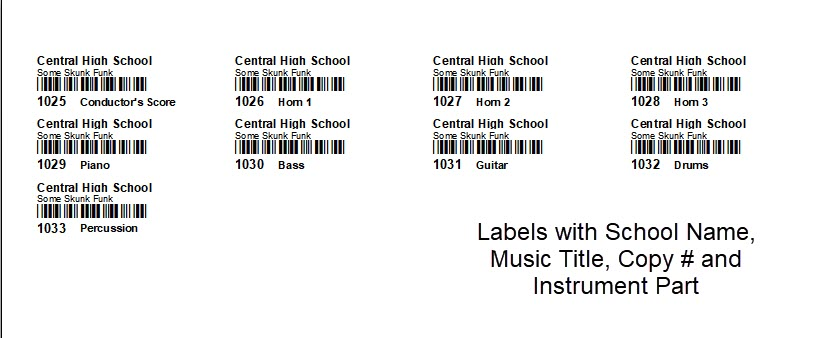
2) Print a label with the School/Organization Name, Title, Barcode and Copy Number - for the Selected Title (in the box at the top of the screen)
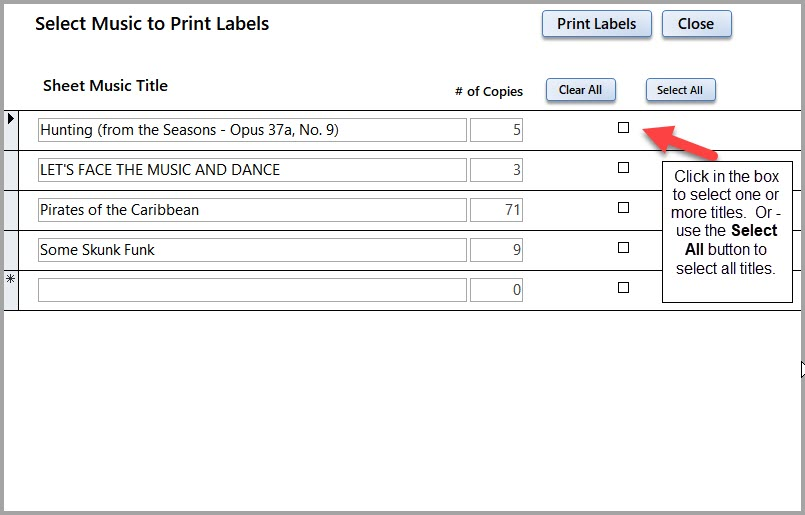
3) Print labels for selected titles. Select the tiles you want to print. This saves you a lot of wasted labels.
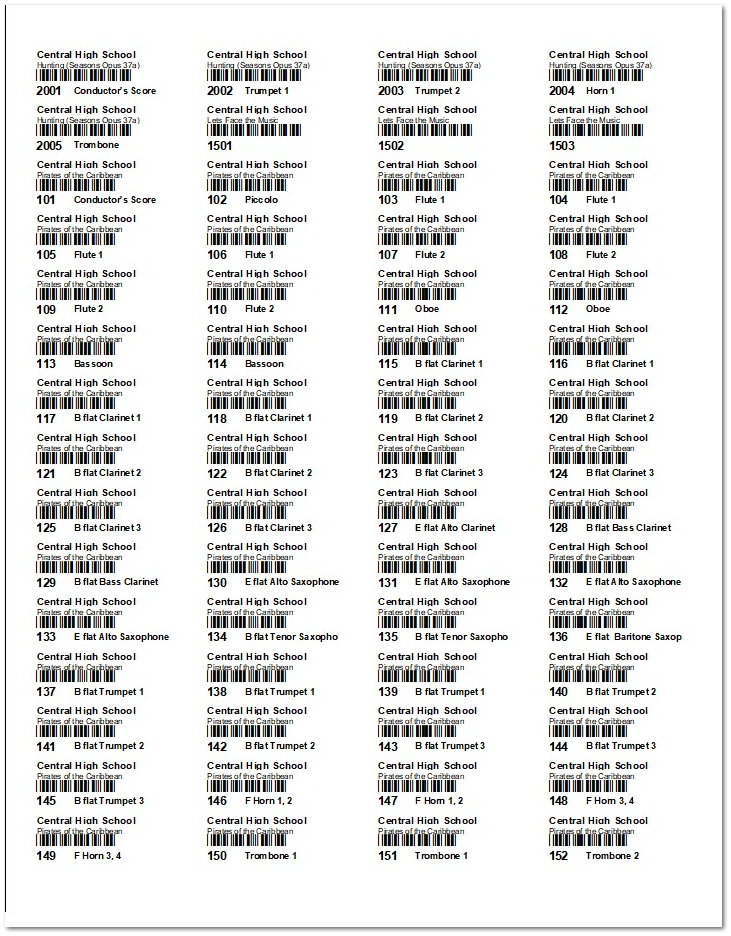
ID Labels for all Selected Sheet Music Titles.
d) Checkouts to students can use their name or Student ID. Be sure to enter the Student ID on the Student screen.
Select the Student Name from the "Select Student" box or the ID from the "Student ID" box.
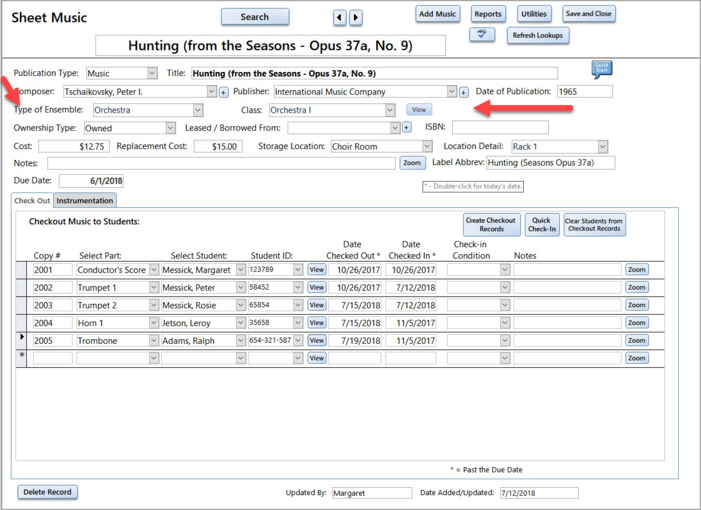
e) Assign Sheet Music to a "Type of Ensemble" and "Class" The Type of Ensemble table can be updated on the Sheet Music Utilities screen.
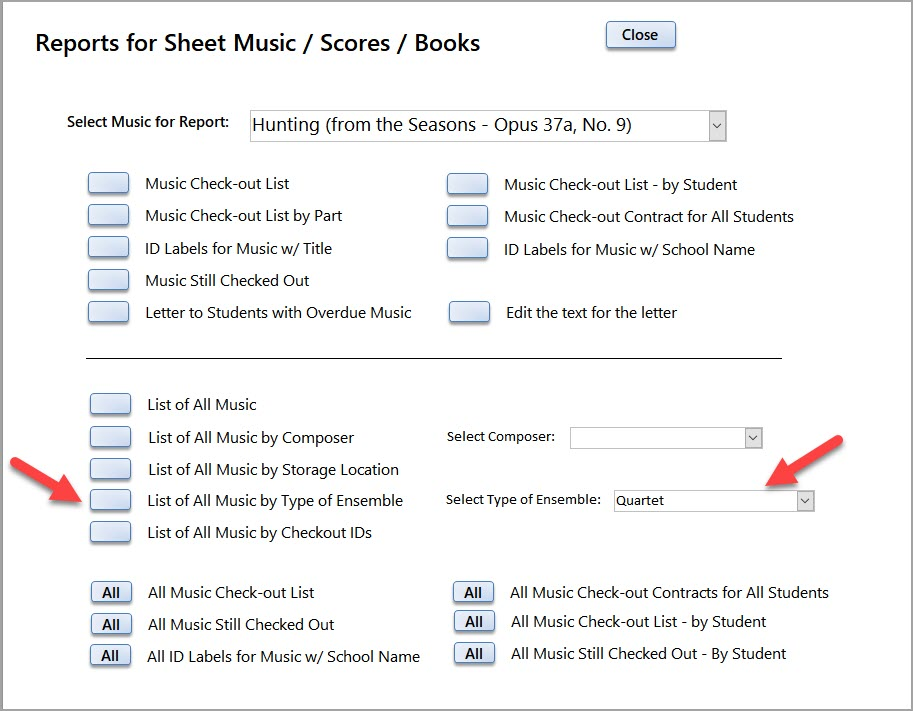
You can also print a list of the music by Type of Ensemble. You can select to print all Sheet Music titles by Ensemble Type or just print the music for a specific Ensemble Type.
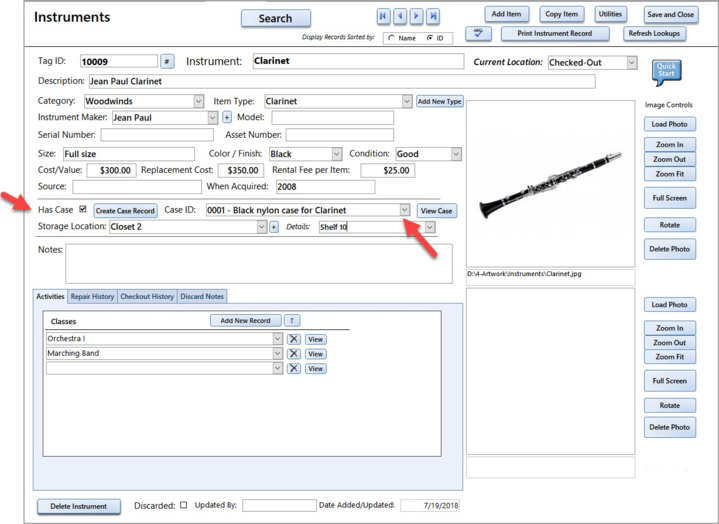
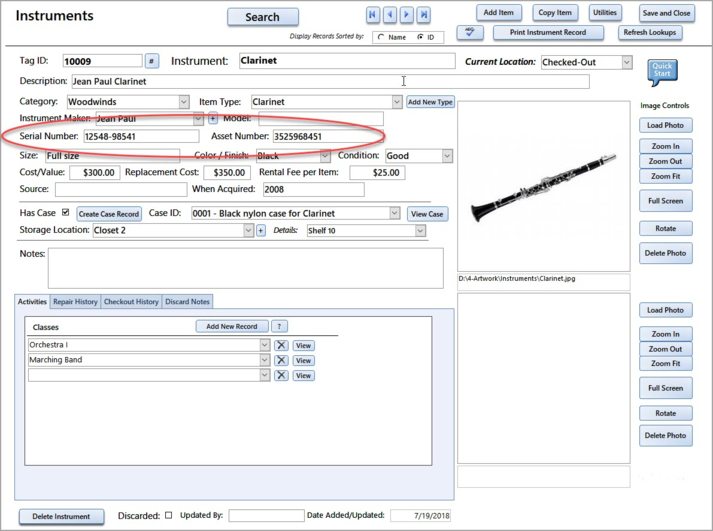
4) Instrument Records now can list Cases
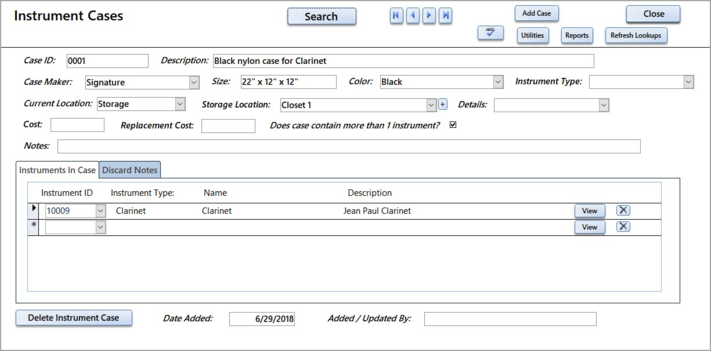
Each Instrument can be assigned a Case. Inventory Records for Cases can be created in the Instrument Case module.
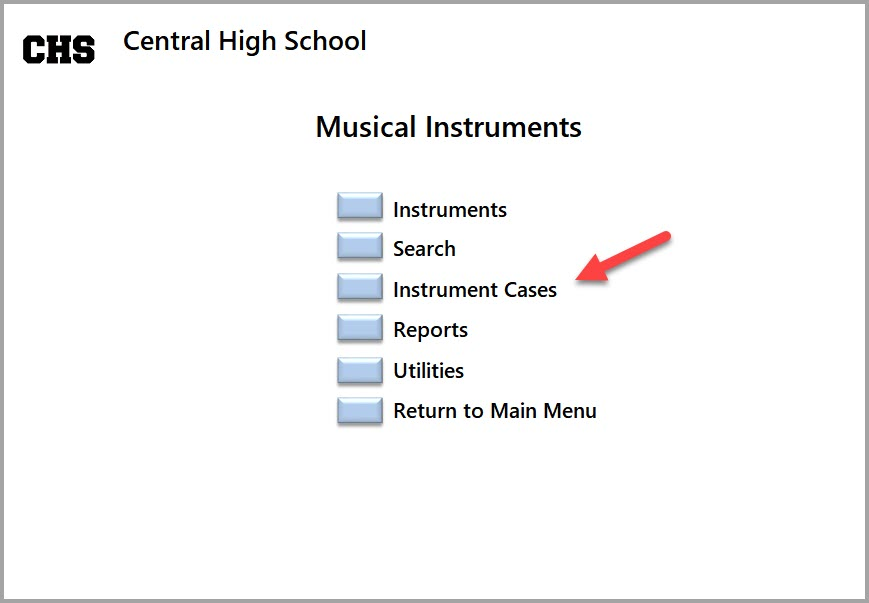
You can view the Case Records from the Instrument Main Menu or from the Instrument record.
One Instrument Case can have more then one instrument in it.
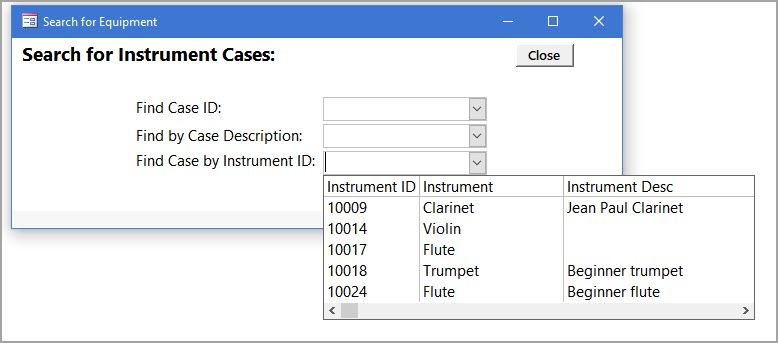
You can search for Instrument cases by several different fields: Case ID, Case Description or by Instrument ID.
5) New Fields for Instrument records. The Instrument record now has a field for Serial Number and Asset Number. You can search on these fields as well.
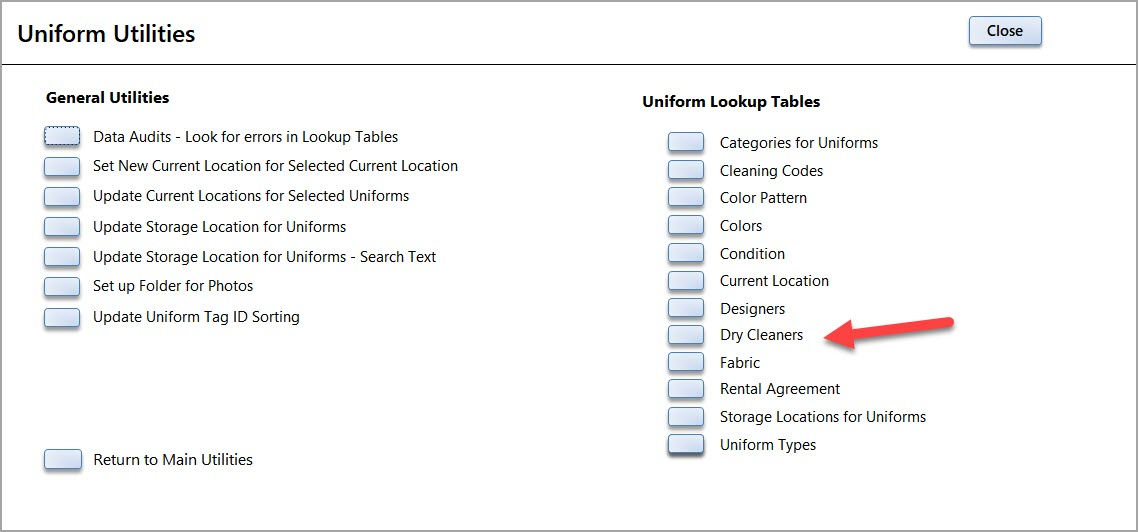
6) The Uniform Module now has a Dry Cleaning module. This module will let you 'check out' uniforms to a Dry Cleaner and then check them back in again.
You can create a record for each Dry Cleaner or cleaning company you use from the Uniform Utilities menu.
Create a record for each cleaner with their contact information. Once uniforms are checked out you will see the list of everything that has gone out and with the items still 'out' at the top of the list.
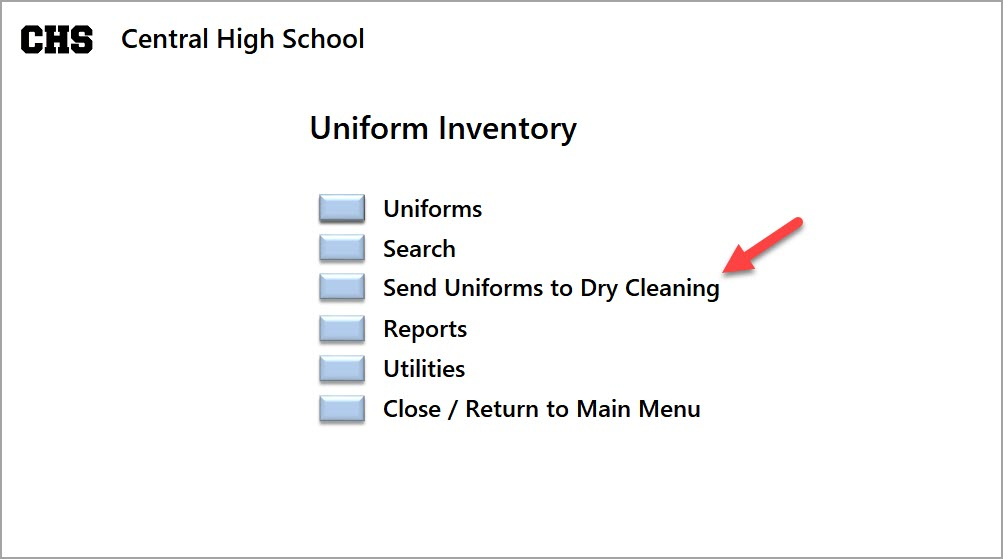
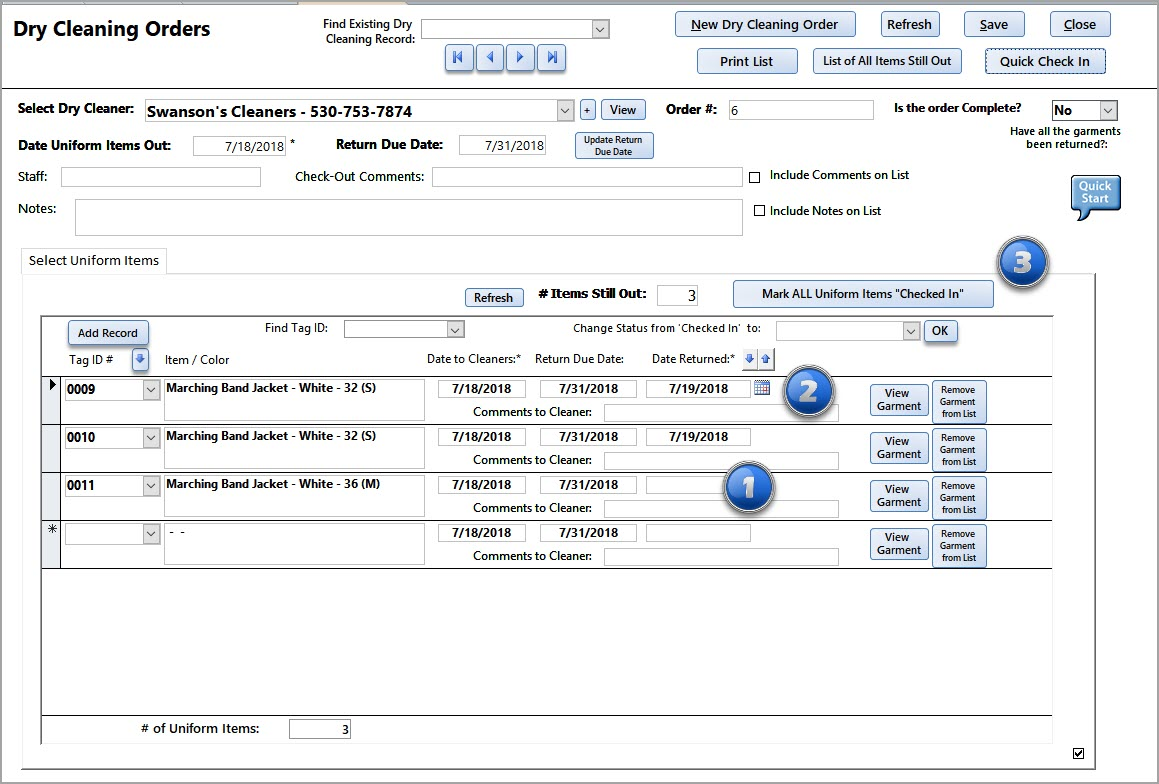
To Send things to the Dry Cleaner: Select the "Sent Uniforms to Dry Cleaning" from the Uniform menu.
1) Click on "New Dry Cleaning Order".
2) Select the Dry Cleaner name from the drop-down list.
3) Enter the Return Due Date
4) Select the Uniform ID off the Tag ID# drop-down list or scan the uniform tag with the barcode reader.
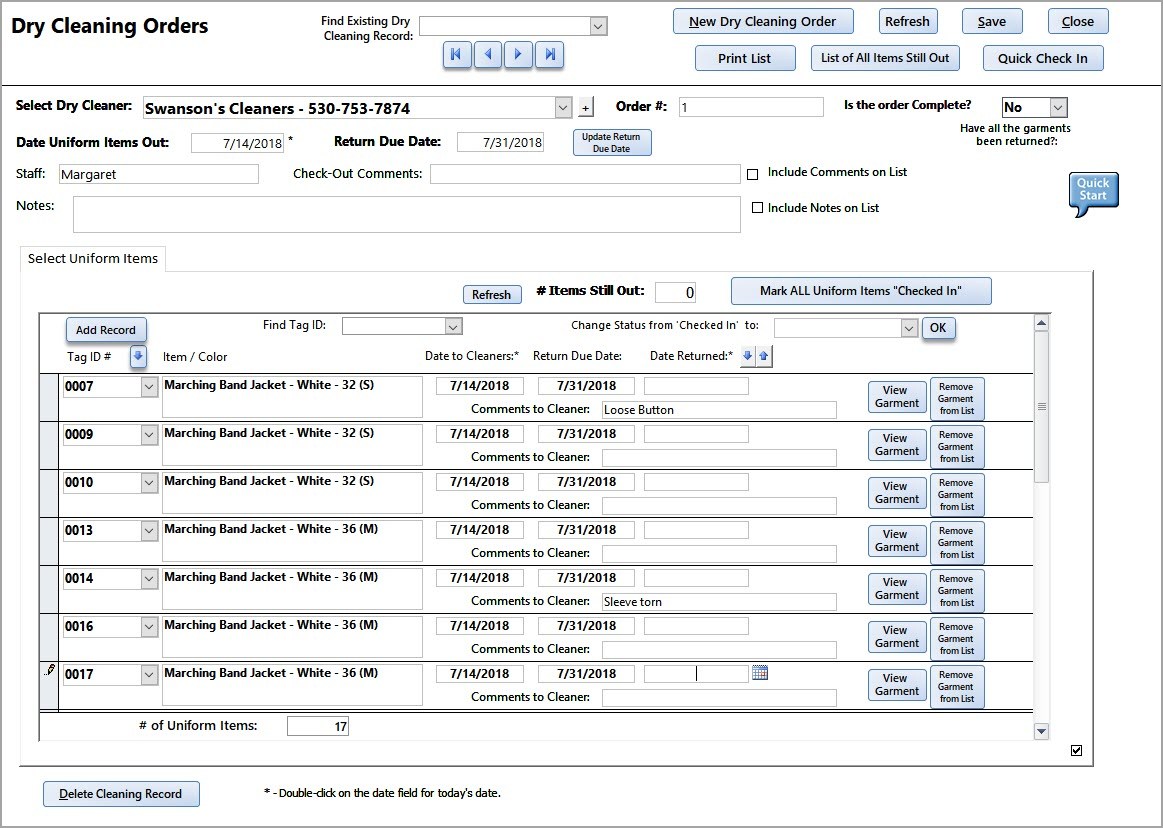
4) When you are finished entering Uniforms, click on the "Print List" to see a list of everything that has been scanned.
When the Uniforms come back from the cleaners you can check them in just as you would a rental. There are 4 ways to check the uniforms in:
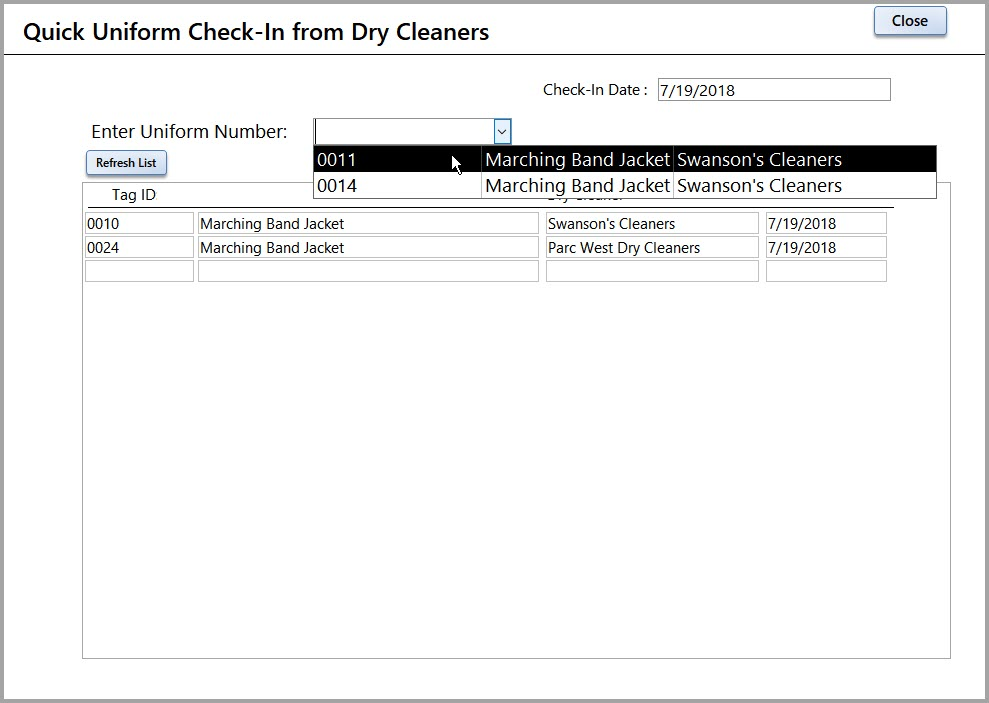
1) Quick Check-in - click on the Quick Check In button at the top of the screen. On the Quick Check-in screen select the Tag ID off the list or place your cursor in the Enter Uniform Number field and scan the tag with the barcode scanner.
On the Dry Cleaning Orders screen: you can
1) Enter the date in the Check-in Date field
2) With your cursor in the Check-in Date field, select a date of the pop-up calendar
3) Click on the "Mark All Uniform Items 'Checked In' " button. All Uniforms will be marked as checked in.