Sheet Music Inventory
The Sheet Music Module is designed to allow you to inventory your sheet music collection and check-out sheet music pieces to your students/performers.
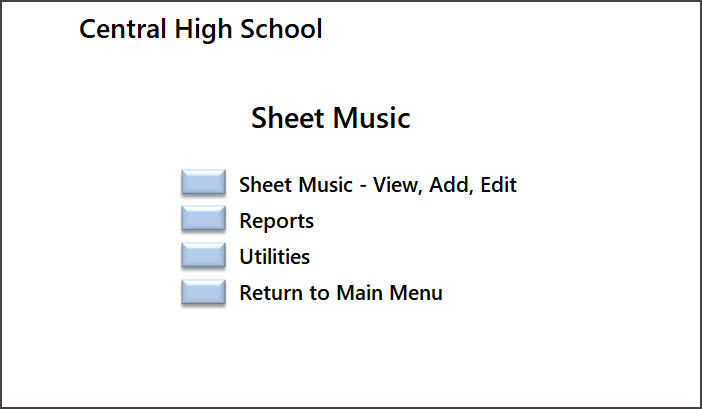
Sheet Music Main Screen
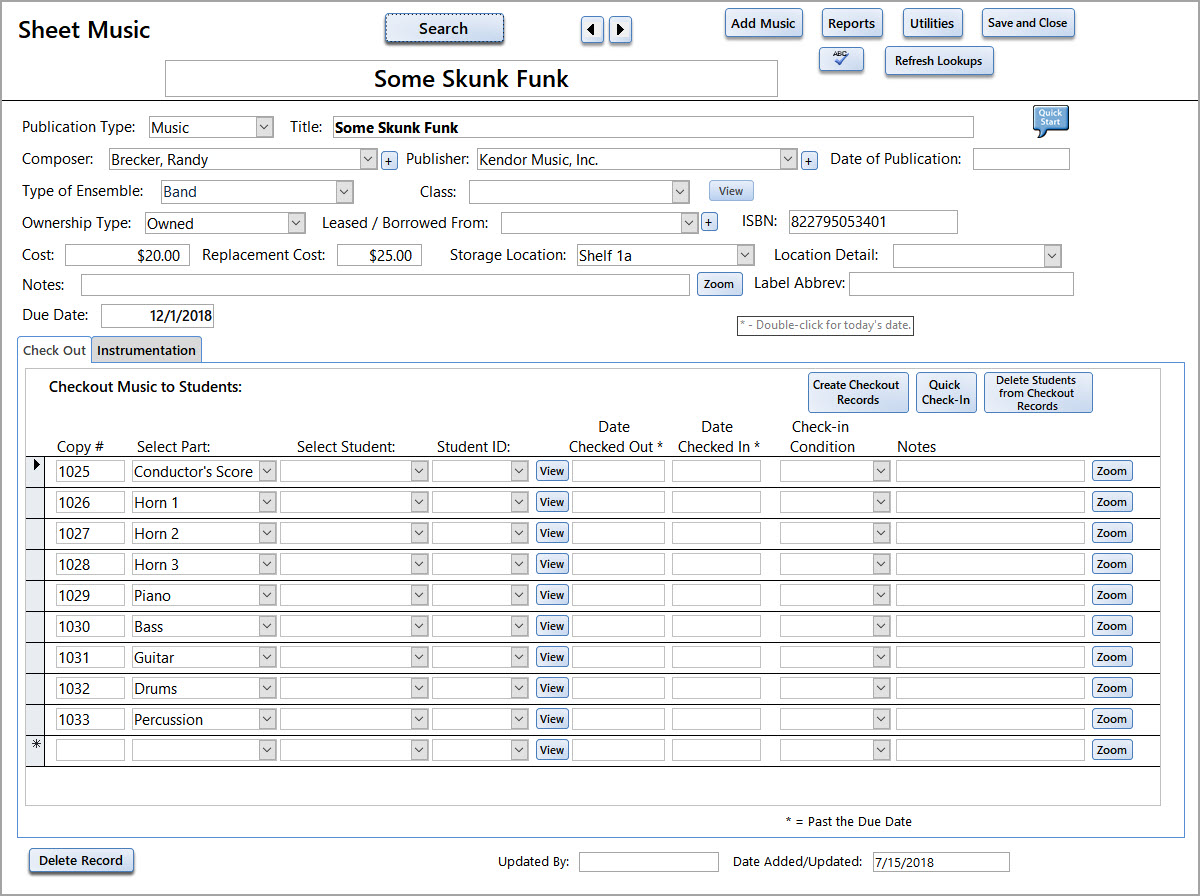
The Sheet Music record allows you to enter descriptions in many fields. There are several drop-down boxes (i.e. Composer, Publisher, etc.) that are based on data tables. You can add new values and edit the current ones in the Utilities section. (The Utilities Menu is available from this screen and the Sheet Music Main Menu.)
Fields:
Publication Type: Sheet Music, Book, Score, etc.
Title: Title of Music
Composer: List the first composer
Publisher: Publisher
Date Of Publication
Type of Ensemble that the work was written for
Class: This is the Class or Activity you have already set up in the Class/Activity section (See Main Menu)
Ownership Type: Owned, Borrowed, Leased
Leased/Borrowed from: The person or company that you borrowed the music from
ISBN: The ISBN - if one is known
Cost: Cost of the sheet music
Replacement Cost: This could be the cost of buying all the music parts again - or the cost of replacing a single part
Storage Location: You can set up a list of Storage Locations - such as Room, Cabinet, etc.
Location Detail: For each Storage Location you can set up more detailed locations - shelf, bin, etc.
Notes: Any notes that might be helpful for this piece of music
Label Abbrev: You can print small labels for each part that include the title of the music. Only 30 characters will fit on the label. If the title is too long you can put an abbreviation here that will print on the label. See the "ID Labels" section below and in the
Reports Menu.
Due Date: This is the date when all checked out music needs to be returned.
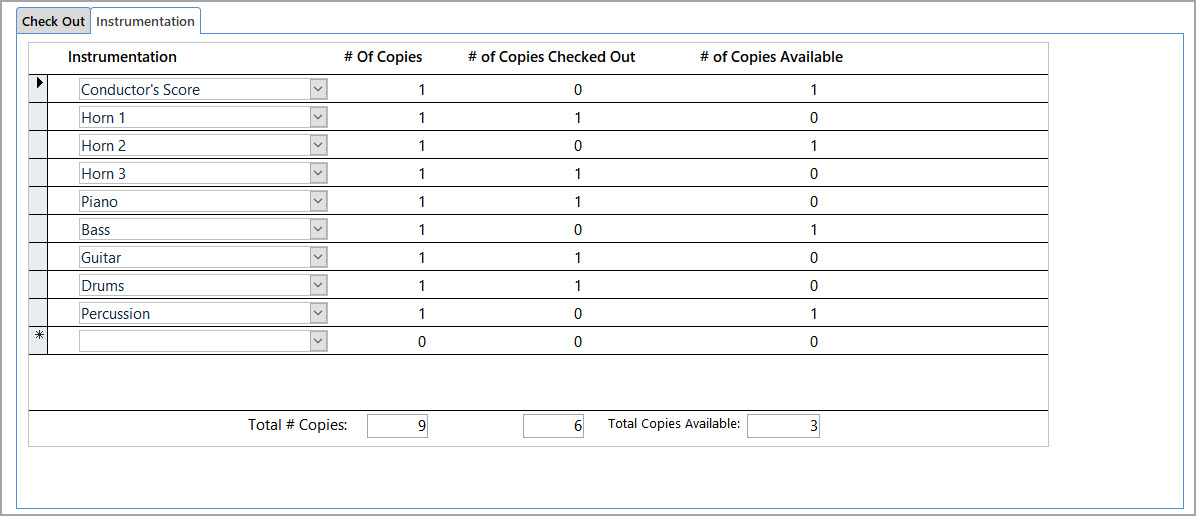
Instrumentation:
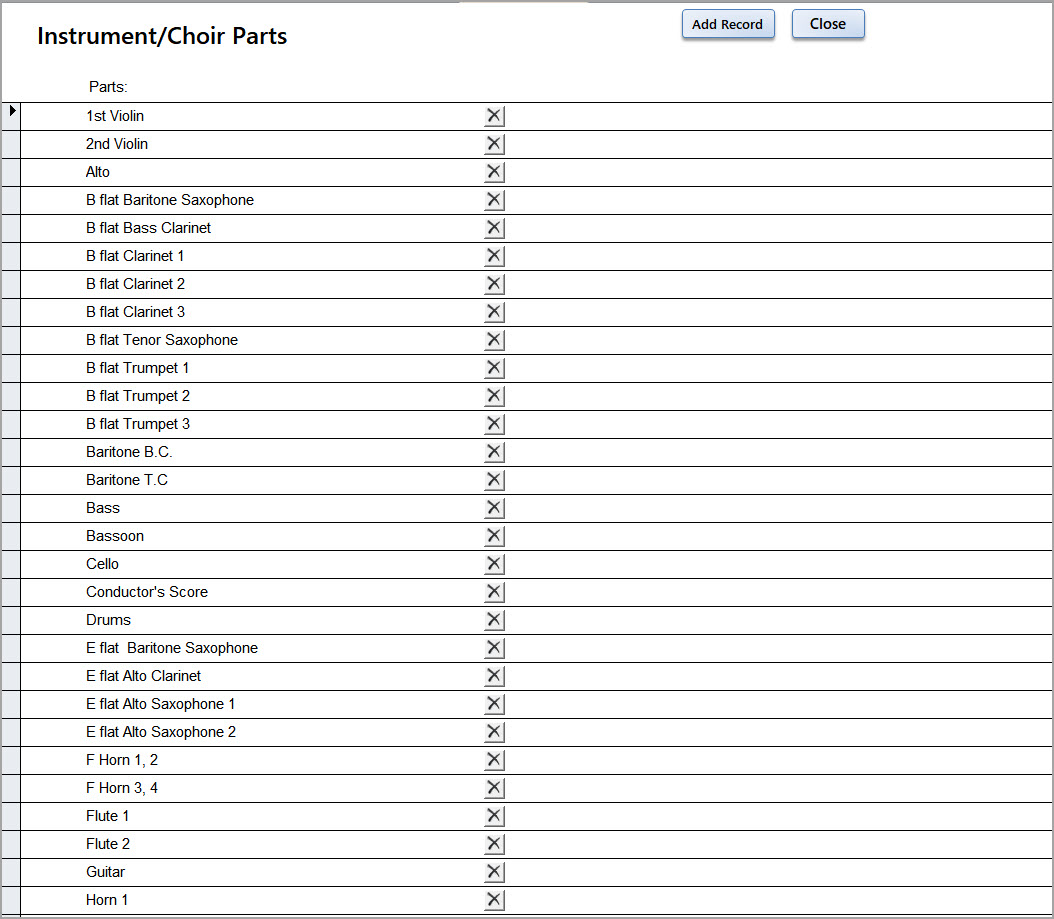
For each piece of music you can list the instrumentation and the number of copies of each part. The list of Instrumentation Parts can be updated from the Utilities Menu / Instrument Parts (also see below).
As you check-out parts to students/performers the number of copies checked out and available is updated.
Create ID Labels for each Part:
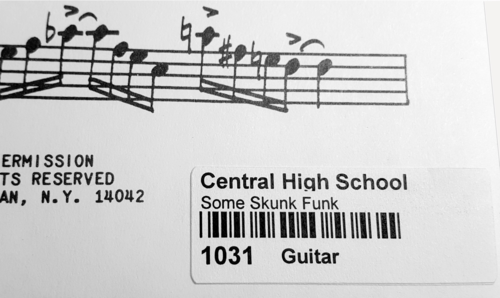
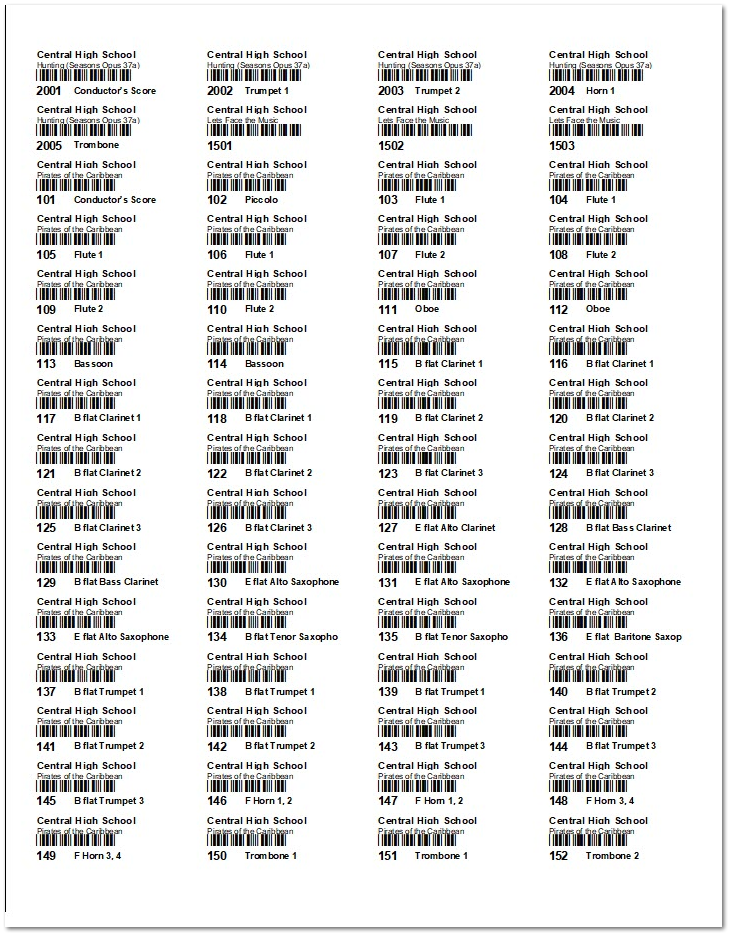
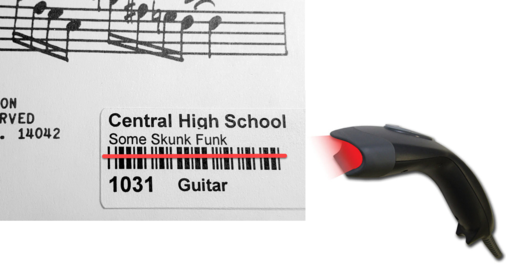
The ID Labels (from the Reports Menu) are designed for you to print on your own printer with the name of your school/organization, the title (or title abbreviation), a barcode and the copy number. You can print them on Avery Label # 5195 / 61533 (2/3" x 1 3/4" labels) that are available from most office supply stores. They are easy to read and the barcode can be scanned when the music is brought back to be checked in.
Steps to create labels:
1) Enter Sheet Music Title and information
2) Enter all Instrumentation
3) Create Check-out records - based on Instrumentation . This will create a record for each part. If there are 2 or 3 copies for a part - it will create that many checkout records.
a. Click on Create Checkout Records button.
b. Enter the Starting number. This is the number that prints on the label and is represented by the Barcode. The Barcode on the label allows you to do a Quick Check-In by scanning the barcode - making it quite easy to check-in a lot of music and find out easily what was not returned. In order for the barcode to work with the scanner the number has to be at least 3 digits (i.e. 001, 1001, etc.) The numbers on the labels are unique to that Sheet Music record. You can have them all start with 100 or 001, etc.
c. If you know the date when the music needs to be returned - you can enter it now - or - you can enter it later when you are ready to check out the music. The Due Date field is right above Checkout Tab.
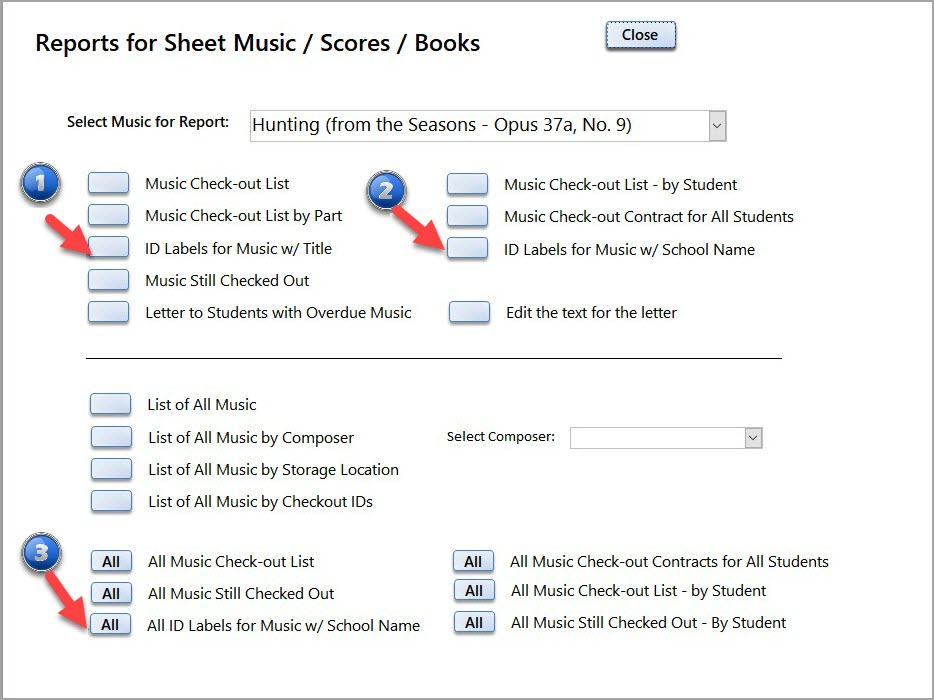
4) Print the ID Labels from the Reports Menu.
There are 3 options to printing the ID Labels.
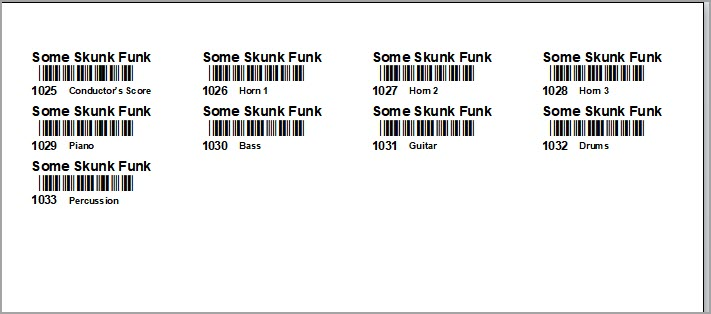
1) Print a label with the Title and instrumentation and Copy number - for the Selected Title (in the box at the top of the screen)
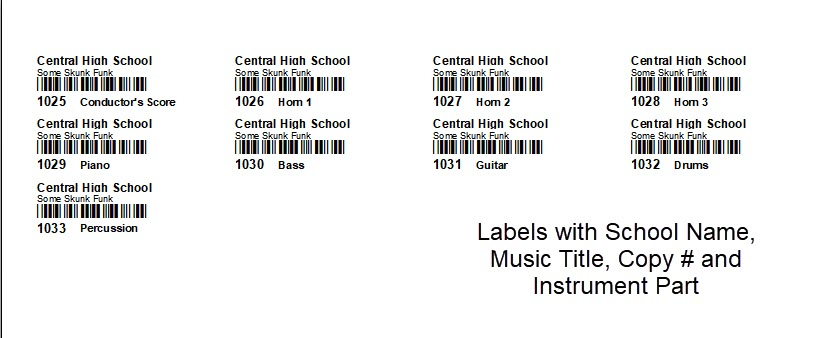
2) Print a label with the School/Organization Name, Title, Barcode and Copy Number - for the Selected Title (in the box at the top of the screen)
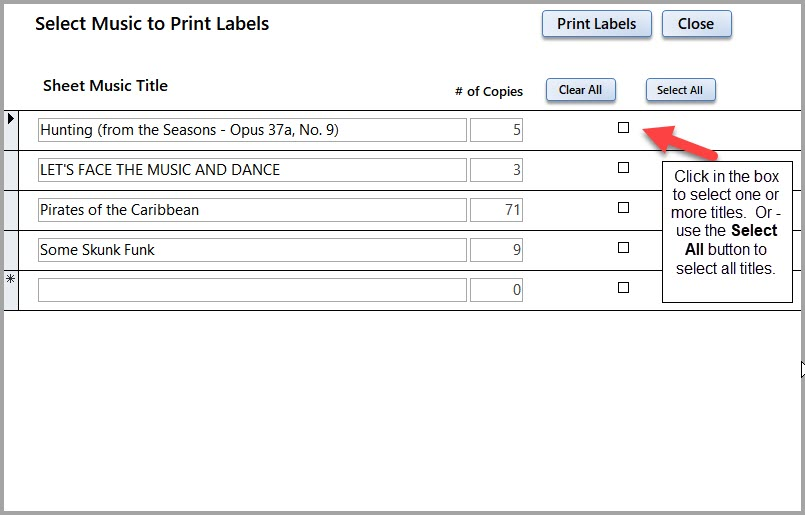
3) Print labels for selected titles. Select the tiles you want to print. This saves you a lot of wasted labels.
ID Labels for all Selected Sheet Music Titles.
Check-out Parts to Students:
Create the Check out Records for each copy of the music. Click on the Create Checkout Records button.
1) Enter the Due Date when the music is to be returned.
2) Enter the Starting Number for the barcode. The starting number can be any 3 or more digit (i.e. 001, 1001, etc) number. This allows you to check in the music with the barcode scanner.
3) There are 3 choices to create the records:
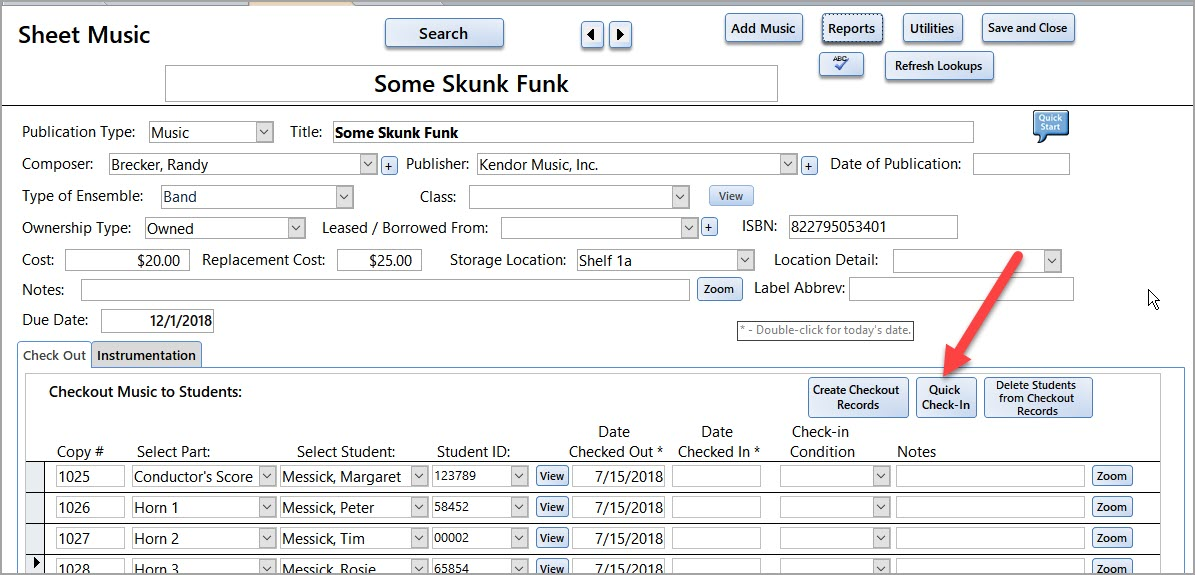
a) Create a checkout record for each copy of the instrumentation - the program will make one check-out record for each part. In the case of the Some Skunk Funk (above example) it will create 9 records and fill in the Instrumentation field.
b) Create a checkout records for each student that is assigned to the class. (The Class is listed at the top of the screen.) If you have already created a student record for each student and assigned them to class and the class is assigned to this piece of music - the program will create a checkout record for each student. You will need to assign the instrumentation to each record.
c) Create records based on the number of copies you enter. The program will create records based on the number of copies you have entered. You will need to enter both the Instrumentation and the Student/Performer Name to each record.
4) If you have not created a record for each student - Create a record for each student / performer in the Students section of the database. Enter as much or as little contact information as you want. Once their record is created and they have checked out music you can see a list of what they have on their record.
5) Assign a student to a copy record by selecting the student name or ID (if the ID is listed in the student record.)
6) Print out a list of the Check-out records from the Report Menu.
Steps to Check-in music - With a Barcode Scanner:
1) Go to the sheet music record you are checking in. Click on the Quick Check-in Button.
2) On the Quick Check-in screen - be sure that the correct title is listed.
3) With the cursor in the Enter/Scan Music Number box - scan the barcode on the sheet music. The Student name and Part Description will appear in the “Checked In” list. Continue scanning all parts for that Sheet Music title. When finished with one title, return to the Sheet Music form, select another title and repeat the process.
Steps to Check-in music - From the Sheet Music Screen:
Find the student’s record and look for the “Date Checked In” field. There are 3 ways to enter the Check-in date:
a) Double click in the “Date Checked In” field
b) Move the mouse to the calendar icon and click. Select the date off the calendar
c) Click in the “Date Checked In” field. Type in the date
Once the Date Checked-in Field is updated the copy is considered 'checked in'. If there is a problem with the condition of the music, it can be noted in the student record.
Clear All Checkout Data:
Once all the titles have been returned and you are ready to check out the music to another group - you can clear the student names and checkout information from the music title. The Copy number and Instrumentation fields will remain.
Click on the links below to see the Reports and Utilities screens and get more information on each feature.