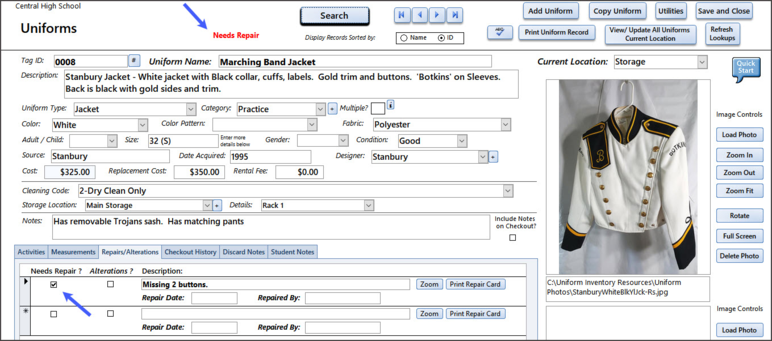
Uniform Screen
The Uniform screen has many fields to describe the uniform and several features (Add Uniform, Copy Uniform, etc). See a list of the features below with links to their pages in the User Guide.
Descriptive Fields for the Uniform
The Uniform Screen has many fields to describe the uniform plus 2 photos.
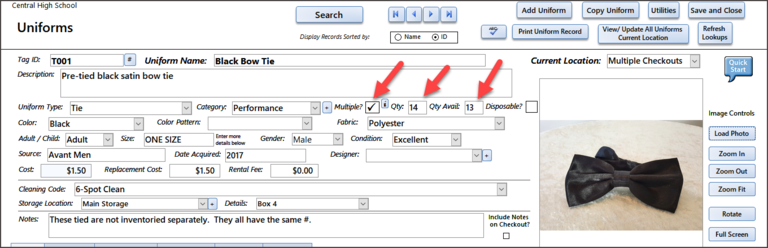
Tag ID: This is the unique number for this uniform. It matches the Tag ID that is attached to the uniform. The number is set when the uniform record is created. If you need to change the Tag ID, click on the "#" sign button next to the Tag ID Field. Click here for the Change Tag ID information.
Uniform Name: This is a descriptive name for the uniform.
Description: This is a longer description of the uniform and can contain information that is unique to this garment.
Uniform Type: This is a drop-down list for Uniform Type - such as Jacket, Bibber, Hat, etc.
Category: This is an optional field that can be used to classify different garments into groups - such as Practice, Performance, Rental, etc. You can enter any set of Categories in the Uniform Utlities screen.
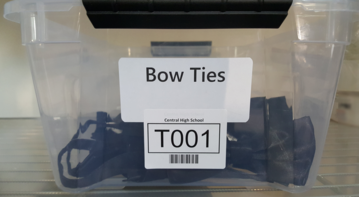
Multiple?: This field is to indicate that you have many identical items with the same Tag ID. For example: If you have many identical bow-ties and don't want to put an individual tag ID on each one. You can assign one Tag ID to the box of bow-ties. You can still check them out to students/musicians but you can scan the label on the box with the Tag ID. Once you click the Multiple checkbox the Qty and Qty Available fields appear. In the example below there are 14 ties in the collection but one is checked out. There are 13 remaining ties.
There are reports for printing out lists of uniforms/accessories that are marked as 'Mulitples'. See the Uniform Reports section. You can print a large tag with the Tag ID and the Barcode on it to put on the box/bin that holds the multiple items.
Disposable: Some very low value items - such as stockings or gloves may be something you provide your students but do not want them back after the performance. These items are marked as "Disposable". They can be checked out (so they appear on the checkout receipt) but are not expected to be returned.
Color: This field is for the primary color of the garment. This value can be searched on. It is a good idea to not add to many colors to the Colors list as it will make it hard to find things later. If you have choir dresses that are red, burgundy, dark red, etc they should all be classified as "Red". In the Description field you can put a more accurate description. Many people have different ideas of what a color is so it is best to stick with the basic colors.
Color Pattern: This field is help describe any pattern - stripes, solids, etc.
Fabric: This is the main fabric of the garment.
Adult/Child: To help identify the size of the garment it is good to have it catagorized as Adult or Child.
Size: This is a basic description of the size - such as Large, Small, or for pants, 34/36 (34" waist, 36" inseam). You can put more details on the size in the "Measurements" tab below.
Gender: This is the gender for the garment - M / F / Unisex
Conditon: The condition can be Good, Poor, Fragile, etc.
Source: The source is the store/company you purchased the garment from.
Date Acquired: This will be approximate date (usually just the year) when the garment was purchased.
Designer / Label: The designer or label for the garment can help identify it.
Cost: This is the original cost of the garment.
Replacement Cost: This is what the school/organization would have to pay if they had to replace it. This value is included on the Checkout Receipt so the student will know what they will have to pay if the garment is damaged or lost.
Rental Fee: If you charge for your rentals - the amount goes here. This value can be discounted on the Checkout screen but this is the base amount to charge.
Cleaning Codes: You can select the cleaning code (Dry Clean, Machine wash, Do not wash, etc.) for the garment.
Storage Location: This is a 2 part field - you can have a main storage location and a detail location - such as "Warehouse" is the main storage location and "Rack 1" is the detail. You will enter the data for the storage locations and details on the Uniform Utilities screen.
Notes: The notes field is a large field to enter any additional notes you want to include for that garment.
The tabs near the bottom of the screen provide access to these features:
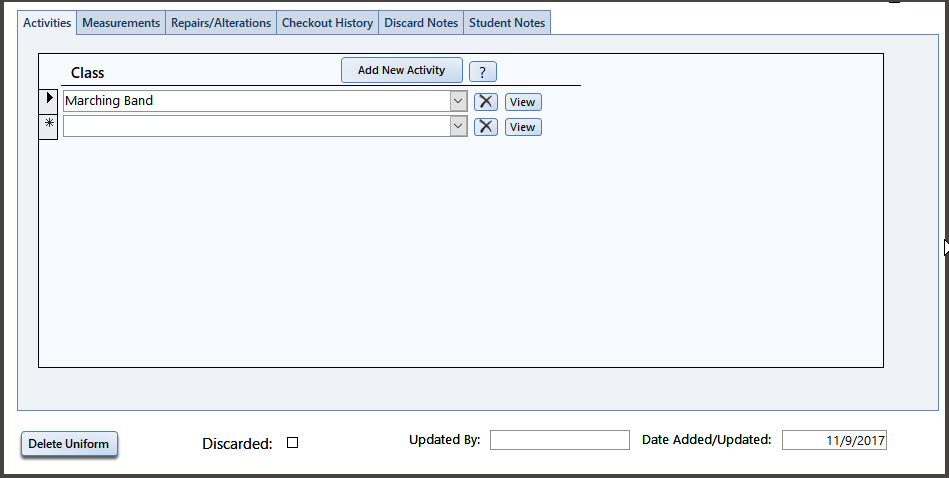
Activities/Classes
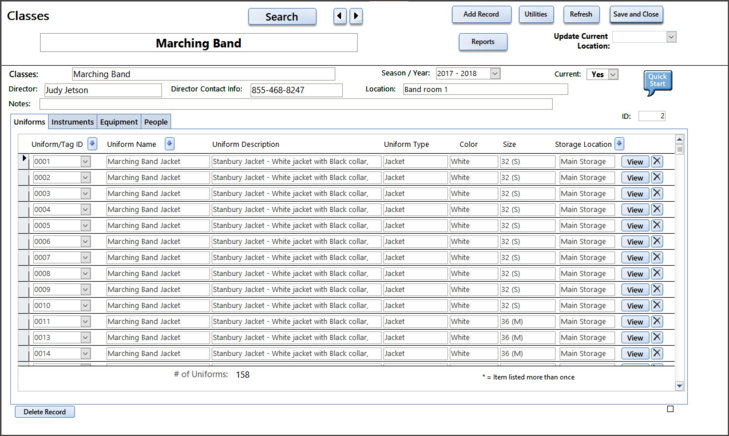
Uniforms, Instruments, Equipment and Students/Performers can be assigned to one or more specific classes or activities. The Classes / Activities tag on the Uniform screen allows you to list one or more Classes/Activities. On the example above this uniform is assigned to the Marching Band Class. More information and several reports available from the Classes/Activities screen.
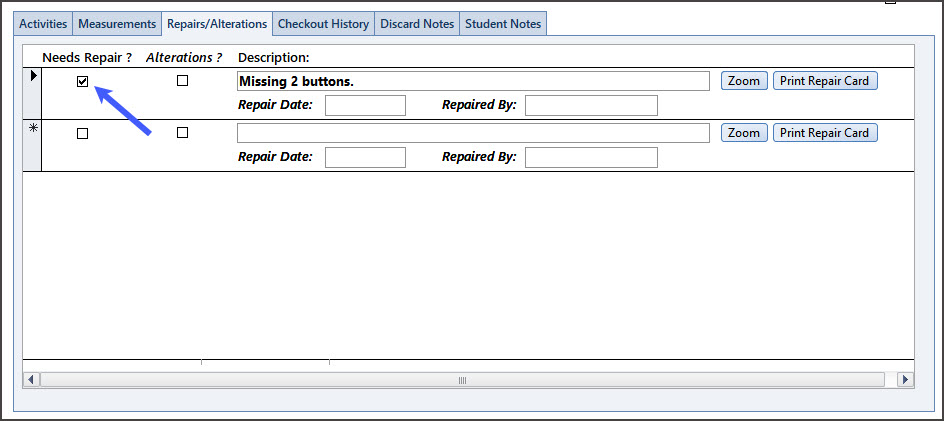
List Repairs / Alterations
You can mark a Uniform record as needs repair or needs alterationa.
While either the Needs Repair or Alterations boxes are marked, the top of the screen will show 'Needs Repair' or 'Needs Alteration'.
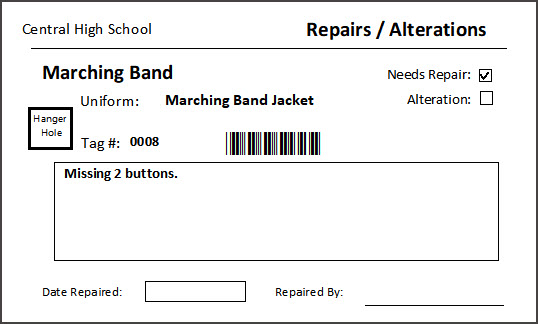
To help the person who is doing the repairs or alterations, you can print out a card with the description of the repairs/alterations needed. The card is designed for a 3" x 5" index card. The card can be pinned to the uniform or placed on the hanger (over the hook).
Once the uniform is repaired the check mark can be removed and the "Needs Repair" note at the top of the screen will disappear.
View Checkout History
The history of everyone who has checked out this uniform can be seen on the Checkout History tab.
You can see in the example below that this jacket has been checked out twice and is still currently checked out. You can go to the Checkout Record by clicking on the "View Checkout" button.
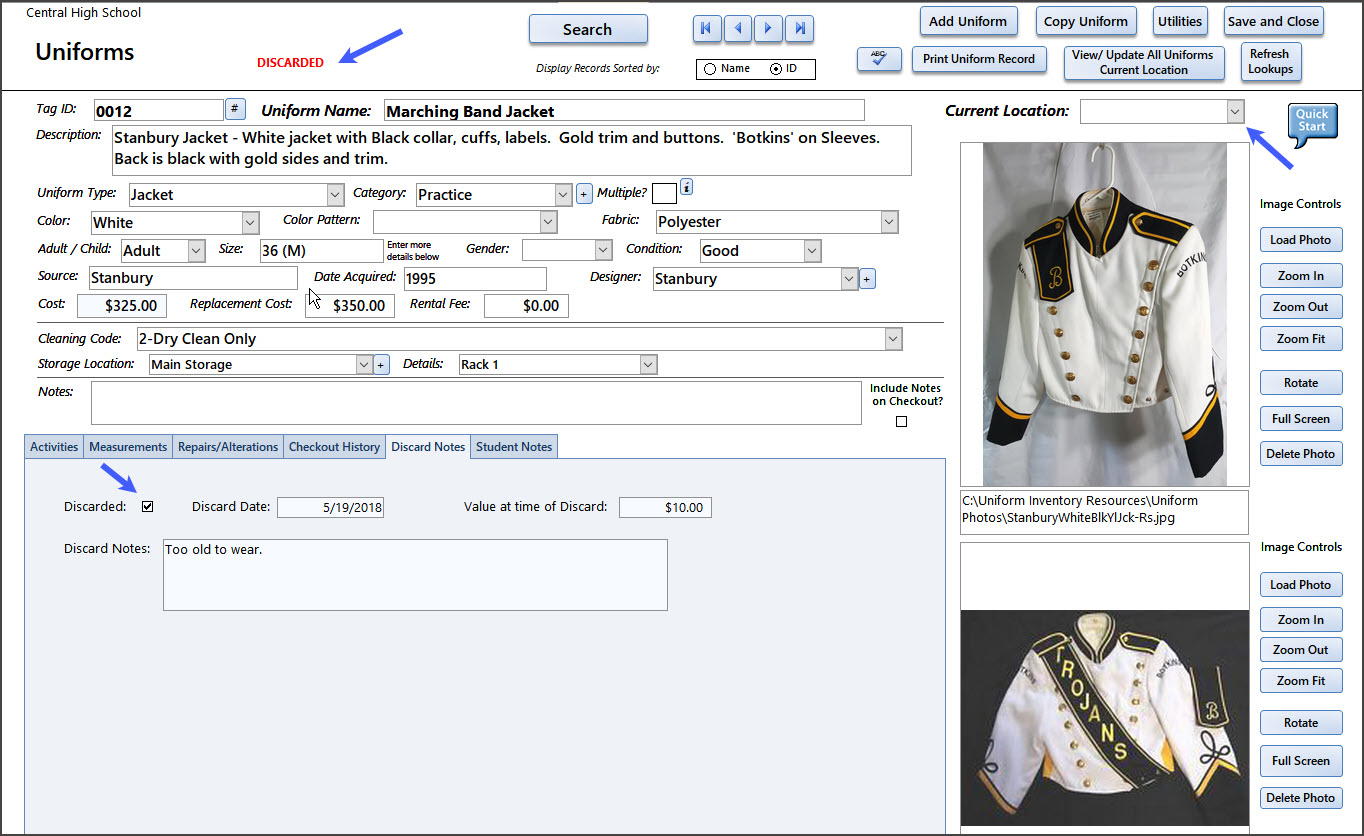
Mark as Discarded
If a uniform is no longer usable but you want to keep a record of who checked it out or how long it was used, you can mark the uniform record as "Discarded". If you need to keep track of the value of the uniform (for the Accounting Office) you can also indicate it's value at the time of the Discard. There is a report for all Discards on the Reports menu. When a uniform is marked as Discarded the Storage Location field is cleared.
Student Notes
If you want to keep track of what a student should provide while wearing this uniform, you can list it here. Anything listed here will be included on the Uniform Record report.
Features:
Go to Next / Previous record - Click on the arrows to move to the next or previous record - or - to the beginning or end of the list. Be aware that the list is stored based on the "Display Records Sorted by: (Name or ID)" buttons at the top of the screen (right below the "Search" button.