Uniform Utilities
There are 2 types of Utilities on this menu: General Utilities and Lookup Table Utilities (see below).
General Utilities
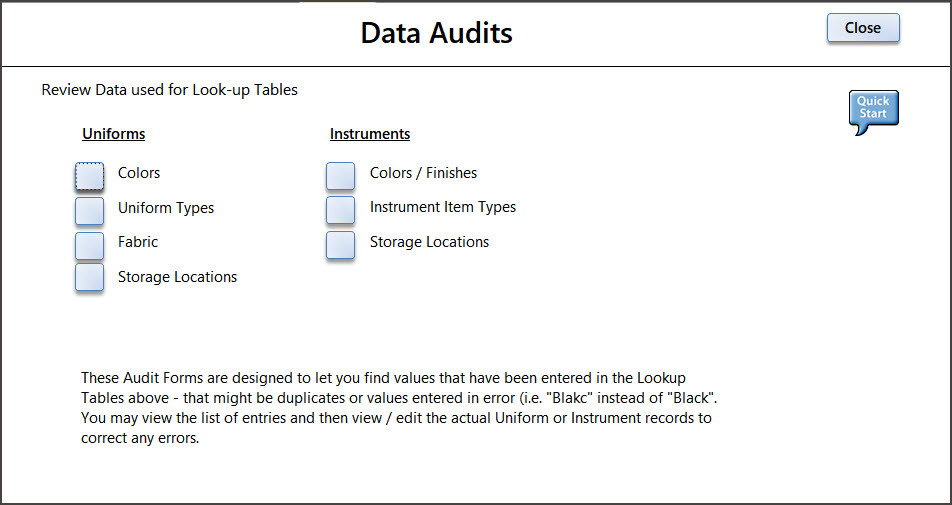
1) Data Audits
The Data Audit tables will show you the list of Colors, Uniform Types, Fabric and Storage Locations for uniforms and show how many records have selected specific values. For example: If you know you have 15 white jackets made by Fruhauf but when you do a search for "Jackets" and "White" and "Fruhauf" only 12 come up. Where are the other 3 records?
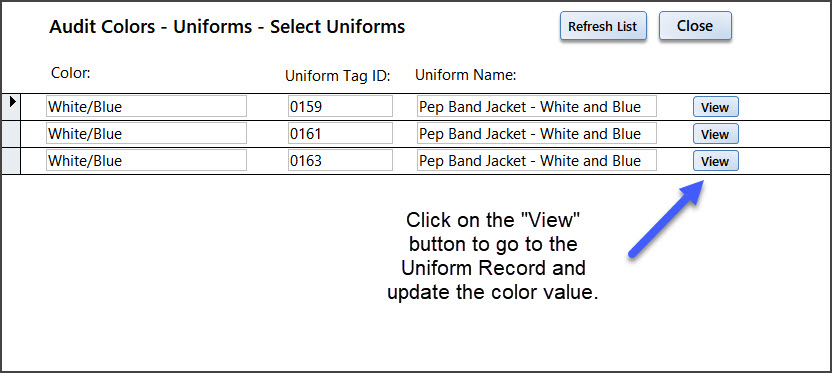
When you do an audit by color you can see the list of colors and how many uniform records there are for each color. There are many records with the color value of "White" but there are also 3 records for "White/Blue". If you click on the "View" button you will see the records that have a color value of "White/Blue".
You can click again on this "View" button to go to the individual record and update it.
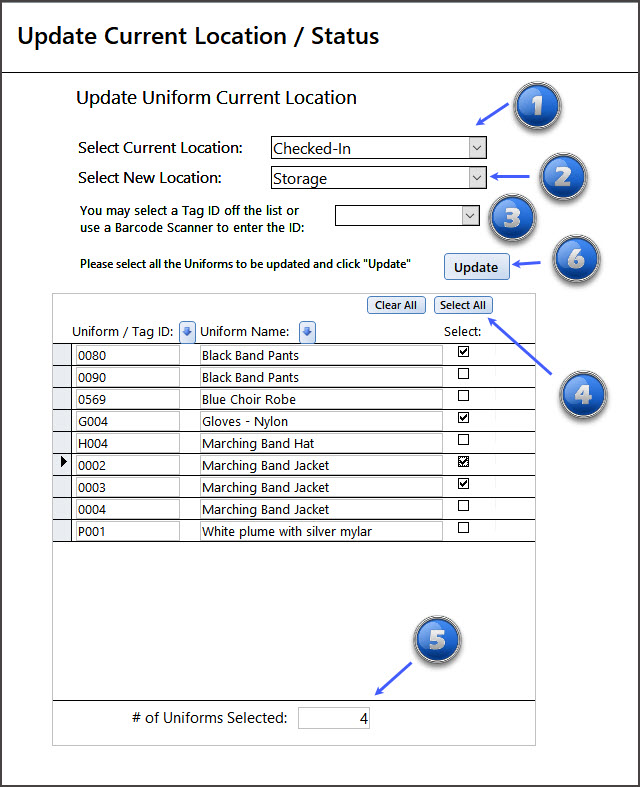
2) Set New Current Location for Selected Current Location
If you have a lot of records that are marked as "Checked In" and want to change them all to "Storage" you can do so with this utility. You can select individual records or select them all to update. When you select a "Current Location" the list of records in the form will show all the Uniform Records for that selected Current Location. You can sort the list using the small blue arrows above the Uniform/Tag ID and Uniform Name fields.
1) Select the "Current Location" to search for records that have the value you are looking for (i.e. Checked-In, Repairs, etc).
2) Select the new location (i.e. Storage, Production, etc.)
3) If you have many records with the Current Location of "Checked In" but only want a few updated you can enter the Tag ID in this box, select the Tag ID off the list or scan the Tag ID with a barcode scanner. Only the records selected (with a check mark) will be updated.
4) You can select them individually by clicking on the check box. You can un-check the "Select" field to not update that record. Or - you may select them all with the "Select All" button.
5) A count of the number of records selected will be shown at the bottom.
6) Once all the records you want to update are selected - click on the "Update" button.
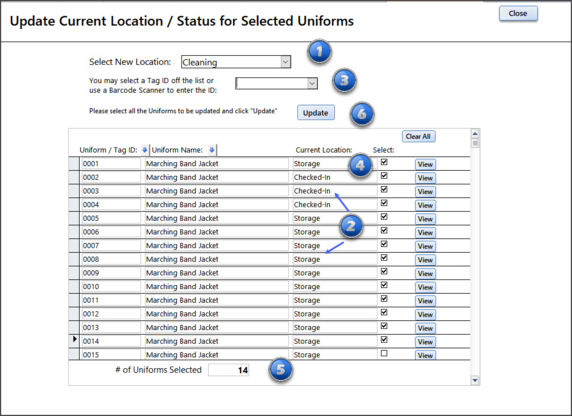
3) Update Current Locations for Selected Uniforms
If you want to change the Current Location for a group of Uniforms that might have different Current Locations at the moment you can use this utility. You can select individual records to update. When you open the form it will show all the Uniform Records in the table. You can sort the list using the small blue arrows above the Uniform/Tag ID and Uniform Name fields.
1) Select the new Current Location
2) You see in this example that some of the records are marked as 'Checked In' and some are marked as 'Storage".
3) If you only want a few records updated you can enter the Tag ID in this box, select the Tag ID off the list or scan the Tag ID with a barcode scanner. Only the records selected (with a check mark) will be updated.
4) You can select them individually by clicking on the check box. You can un-check the "Select" field to not update that record.
5) A count of the number of records selected will be shown at the bottom.
6) Once all the records you want to update are selected - click on the "Update" button.
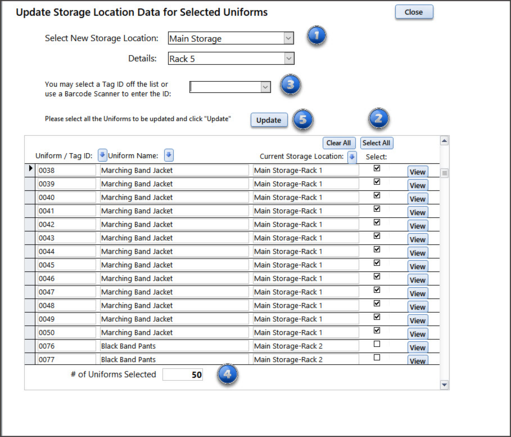
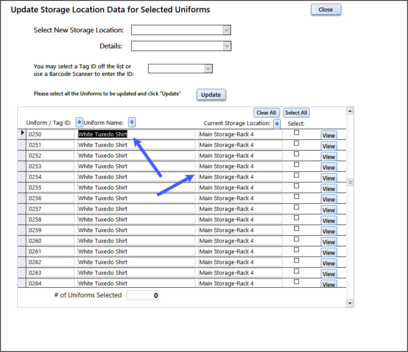
3) Update Storage Location for Uniforms
If you have assigned a group of uniforms to one storage location and now want to move them to a new location - you can update the Storage Location value with this utility. When you open this form all the Uniform records will be listed. You will select the ones you want to update. You can sort the list using the small blue arrows above the Uniform/Tag ID, Uniform Name and Storage Location fields.
1) Select the new main Storage Location and the Location Details values.
2) You can select one or more records by checking the Select box.
3) If you only want a few records updated you can enter the Tag ID in this box, select the Tag ID off the list or scan the Tag ID with a barcode scanner. Only the records selected (with a check mark) will be updated.
4) A count of the number of records selected will be shown at the bottom.
5) Once all the records you want to update are selected - click on the "Update" button.
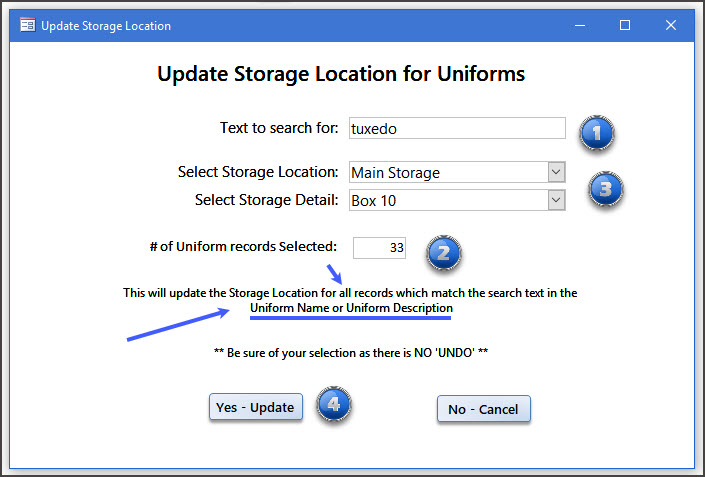
4) Update Storage Location for Uniforms - Search Text
You can see that there are many records with the word "Tuxedo" in the Uniform name. If you want to search for just those records by the word "tuxedo" can change their storage location you can do that with this utility.
1) Enter the word you want to search for in the Uniform Name or Description fields.
2) The number of records that match that search will be shown. If this doesn't sound right - cancel this operation and return to the Search feature and do a search for that value and see what comes up.
3) Select the new Storage Location and Detail values.
4) Click on the "Yes Update" field. Please be aware that there is no "Undo" function. You should be sure of what records you are updating.
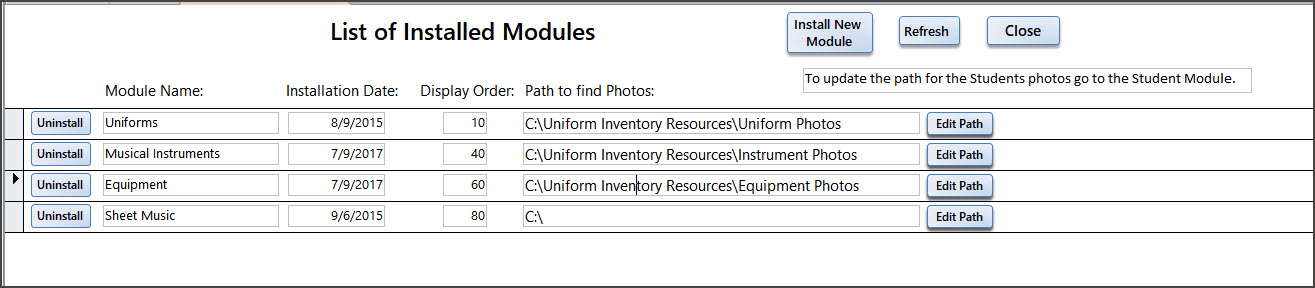
5) Setup Folders for Photos
The "Path to Find Photos" is the path where all the photos are stored for the database records. It is a good idea to put the path/folder name here so when you are adding photos to records the program will know where to look for them.
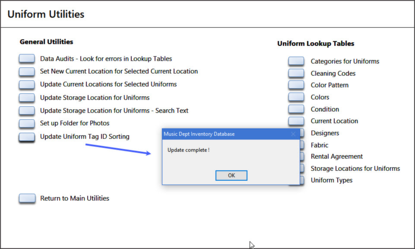
6) Update Uniform Tag ID Sorting
The Uniform records are sorted by Tag ID but as Uniform records are added, deleted or the Tag ID is changed - sometimes the table of Uniform records needs to be re-sorted. If you find that using the Next or Previous buttons on the Uniform screen is not moving the records correctly in Tag ID order, then it is a good idea to re-sort the data. This function only takes a few minutes. When it is done you will see this message:
**** One note: The Uniform records can be displayed in Tag ID order or Uniform Name order. You can switch the order using this feature on the Uniform screen.
********************************************************************************************************
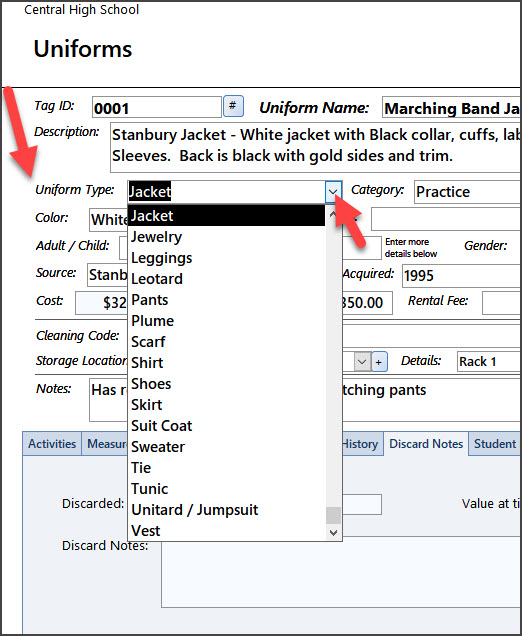
Uniform Lookup Tables - These are the tables that supply the values for the drop-down boxes on the Uniform screen.
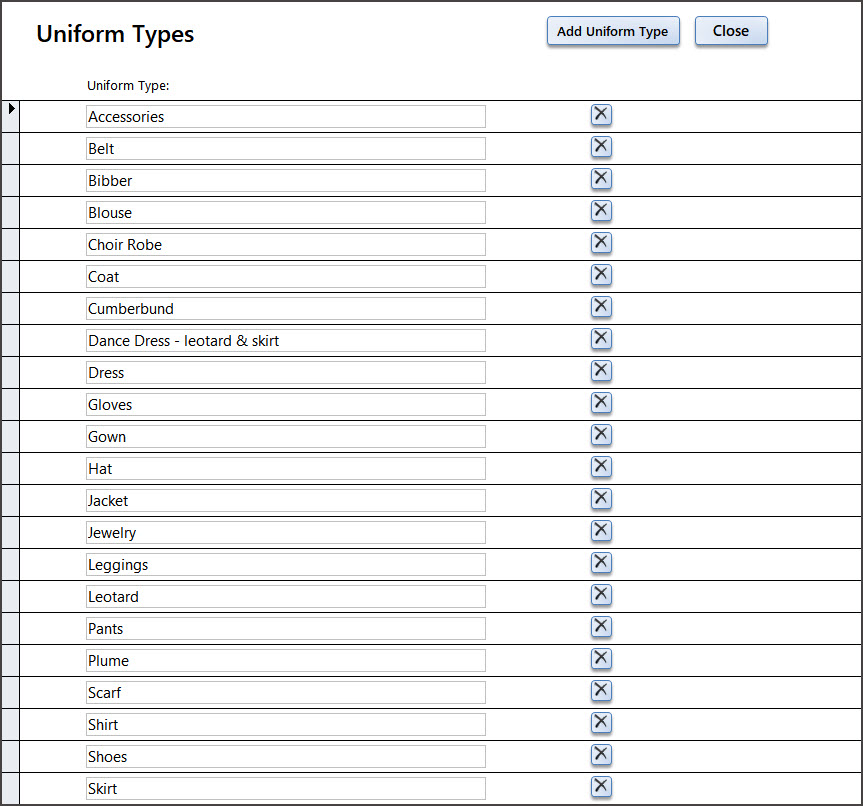
For example: the Uniform Types form is below. To add a new uniform type, click on the "Add Uniform Type" button. You will be taken to a blank record at the bottom of the list. Once you Close the form the table will re-sort in alphabetical order.
To delete a value in the table - click on the "X" button to the right. You will be asked to confirm the deletion. If you have a Uniform record with that value assigned, the value in the field will be blank.