New Features Version 10
New Features for Version 10
1 - New features for Photos - View File Size and Rotate
2 - Jewelry Module / Stand-alone database Added
3 - Print Preview menu added
4 - Asset Management Reports
5 - Behind the scenes updates to allow for more tabs to be open at the same time
6 - New fields for Performer Measurements
7. Update Rental Fee for Costume Pieces by Costume Type
8. Checkout-Rental forms updated with Customer Sales Tax rate
9. Props/Sets Rental Package feature updated
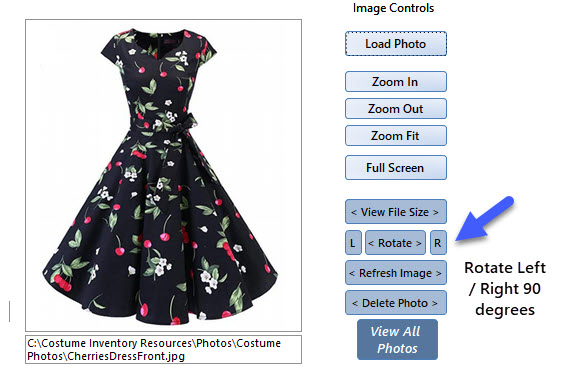
1) New features for Photos - View File Size and Rotate
The "View File Size" button will open a popup with the file size.
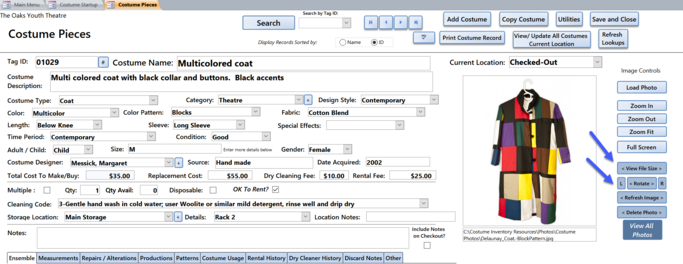
If the file size is less than 750 kb, you will see the message - "Good File Size".
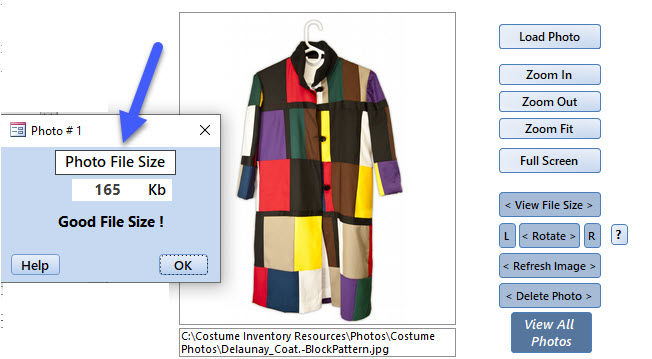
If the File size is great than 750 kb you will get a message encouraging you to resize the photo.
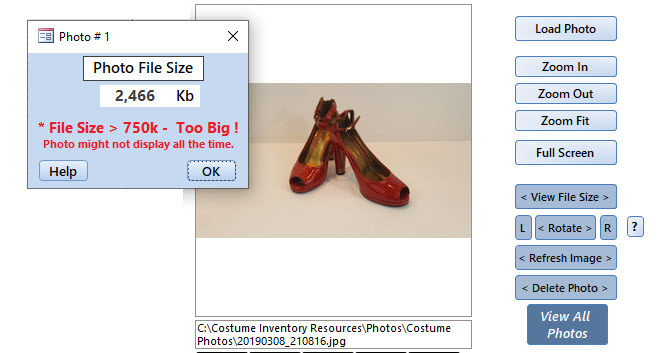
The Help message below gives you suggestions on software to use to resize the photo.
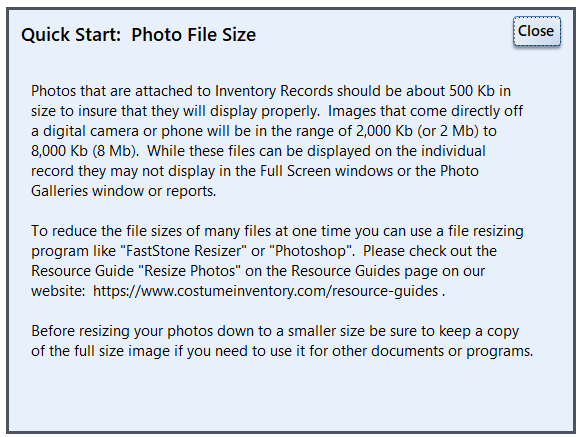
Rotate Photos
Many times customers take photos with their camera or phone that look right in the Windows Explorer screen but when they are imported to the Theater / Equipment Inventory database they are rotated 90 degrees. We have added a new feature to rotate photos Left or Right by 90 degrees. Please note that this is a PERMANENT change to the photo and the file size might be changed by 2-3%. We advise that you always have a backup copy of all your photos so if you decide the rotation or size modification is not what you want - you can go back to the original. Costume Inventory Resources will not be responsible for changes made to the photos.
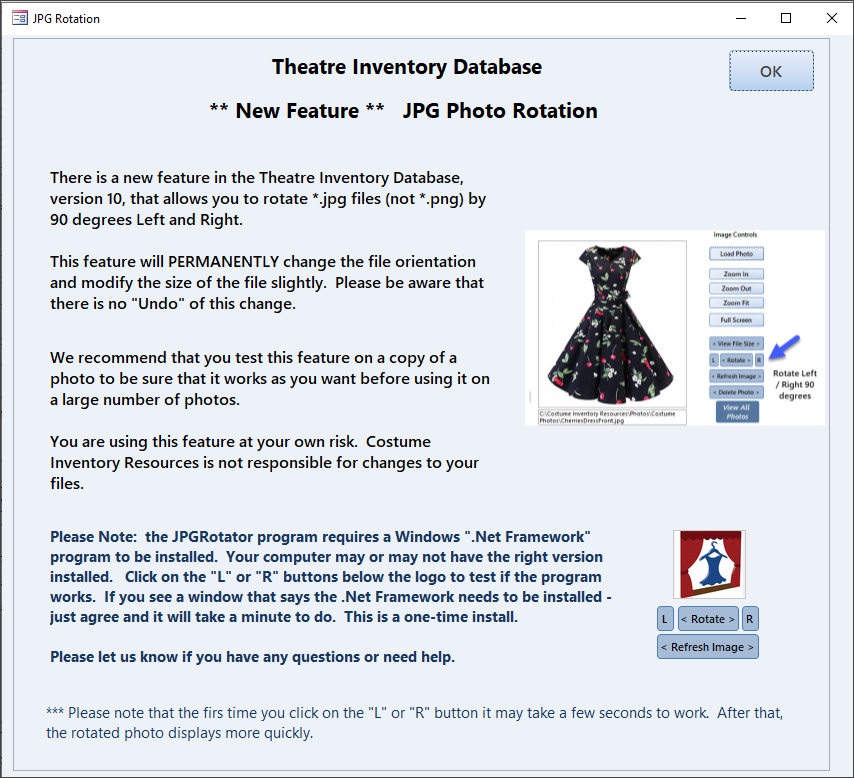
When you open the program for the first time or click on the ? button next to the Rotate R button, you will see this message:
***** Please note ***** On very new computers you may see a message the first time you click on the L or R Rotate buttons:
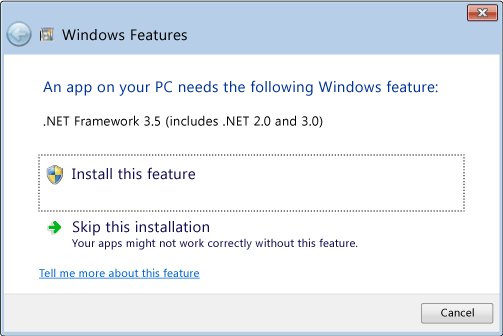
This is a one-time issue. The newer versions of Windows 10 do not have the older .NET Framework installed. Click on "Install this feature". It will do a download and install. It takes about 3 or 4 minutes. Once it is done, you won't see that issue again. Please be aware that if you are installing the database frontend on several workstations - this may need to be done for each one.
See the following video of how the rotation feature works:
2) Jewelry Module Added
The Jewelry Module has been added to the Theatre Inventory Database. It allows you to catalog individual jewelry pieces and sets of jewelry (i.e. a necklace can earrings).
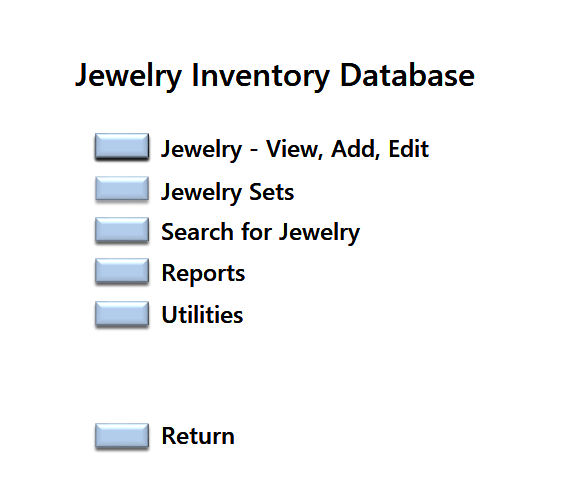
The Jewelry data entry form is very much like all the other database forms but all the fields are tailored to jewelry.
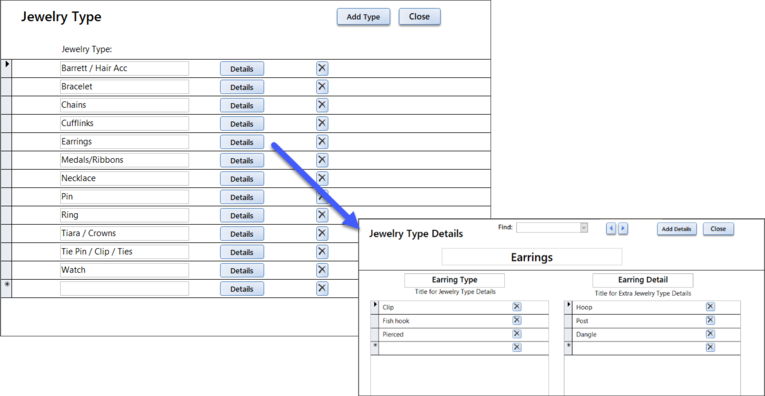
For Jewelry Type (necklace, ring, cufflinks, etc) there are 2 possible descriptions for the type. For the example below - the Jewelry Type is Cufflinks and the Cufflink Type is Bullet Back. See more details below.
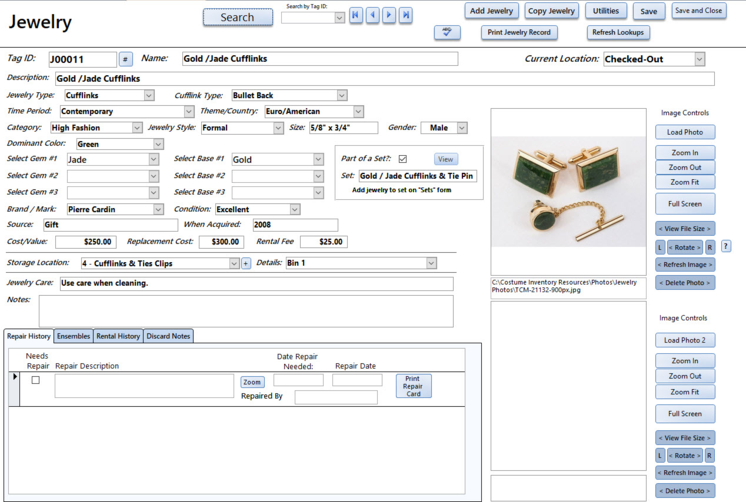
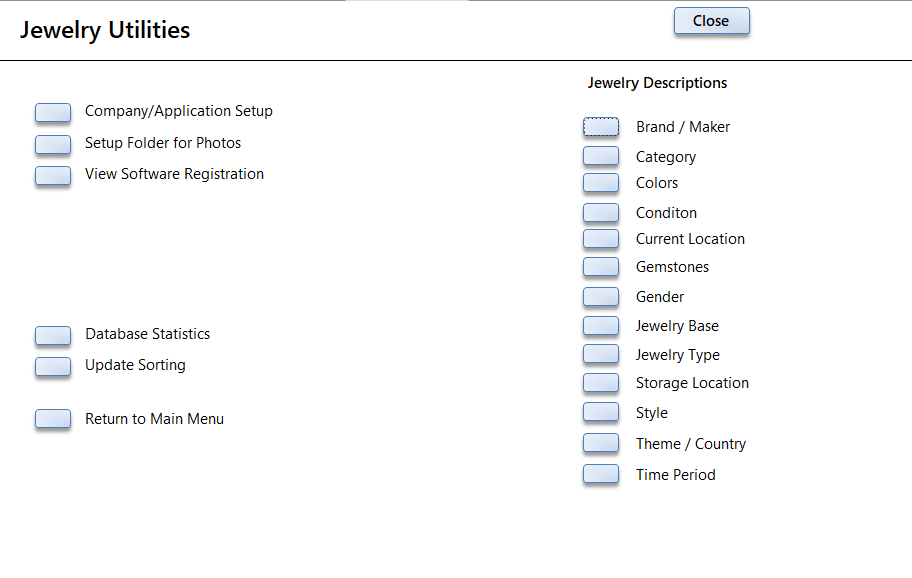
All the drop-down menus can be updated on the Jewelry Utilities menu.
For Jewelry Type - see the following screens. You can add/delete/change any of the types or values in the tables to suit your collection.
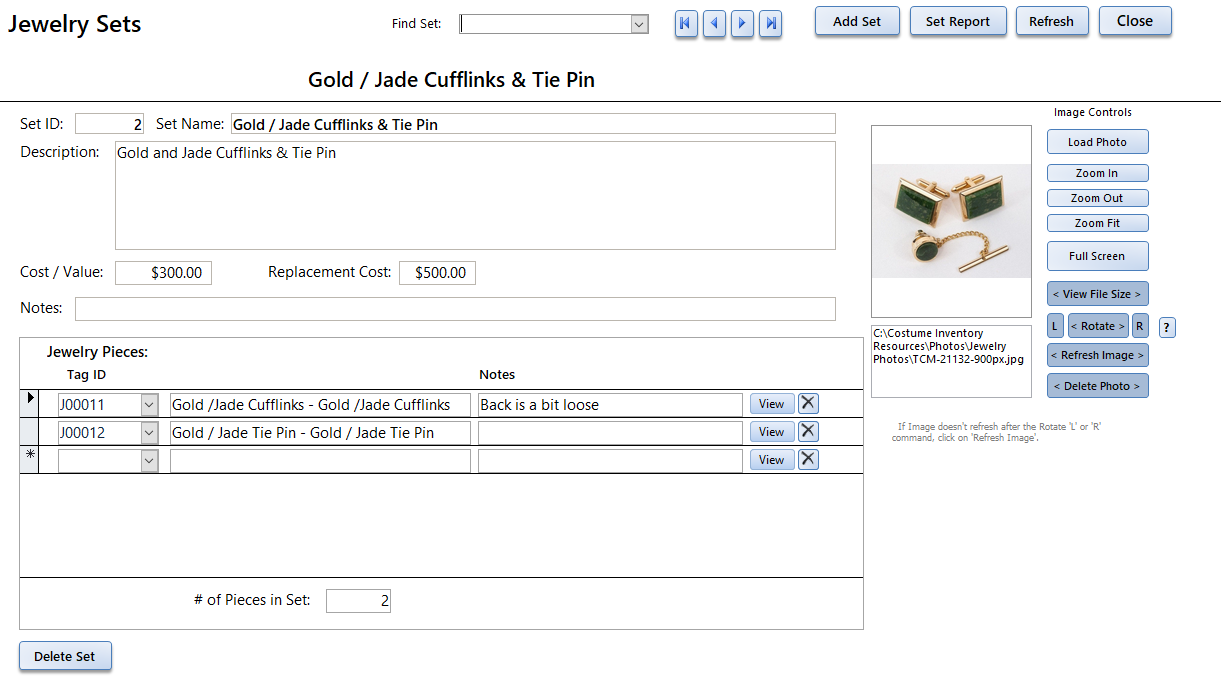
Jewelry Sets:
Each piece of jewelry is cataloged separately but can be listed as a set. To create a set with jewelry pieces:
1. Create Jewelry records for each piece.
2. Create the Set - with a set name and description.
3. Add each Jewelry Pieces by Tag ID
4. Return to the Jewelry Piece form to see the Set listed.
What is the difference between a Set and an Ensemble?
A Jewelry Set is a record that connects 2 or more Jewelry Pieces together. It is a way to recognize that several pieces can be worn together and should be kept together.
An Ensemble is a record that connects Costume Pieces, Props/Sets (i.e. a sword), Wigs and Jewelry. An Ensemble can be assigned to a role and performer in a production. The Production Reports will list the Ensemble and all pieces that are connected to it.
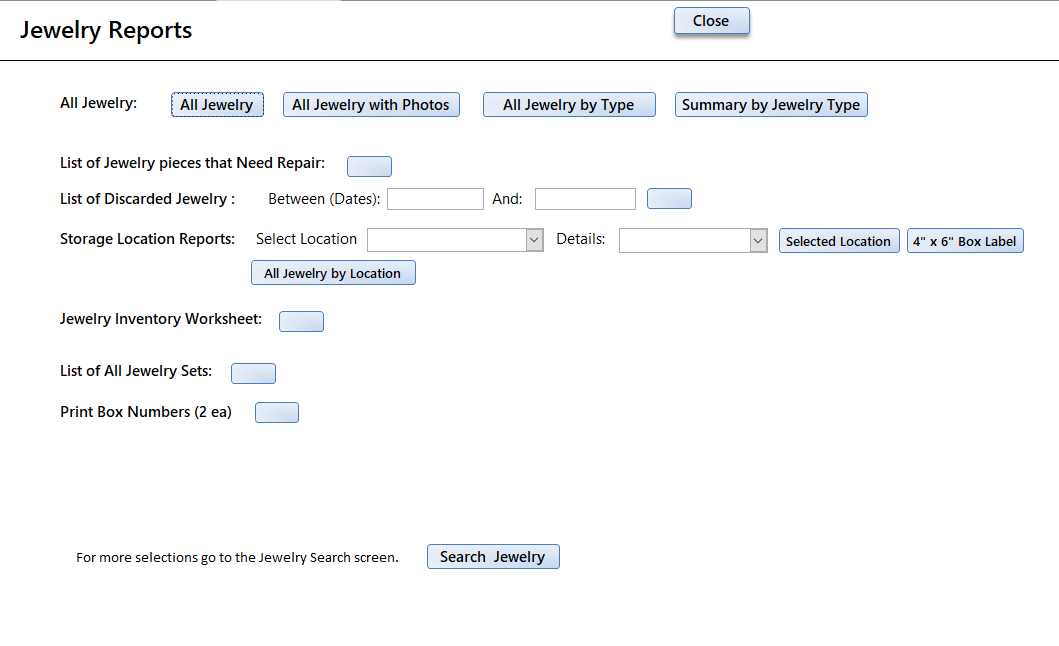
Jewelry Reports
There are a variety of reports available to print. All reports can be printed to a printer or PDF file.
3) Print Preview menu added. This is just a shortcut to the printing features and may save you a few keystrokes.

The top buttons are to move to the next / previous page.
The Print1 / Close will print one copy of the report and close the Print Preview screen.
The Print button will open the print dialog box so you can choose the printer, the number of copies, etc.
Save as PDF - will prompt you to enter the name of the PDF file for the output.
Close Report - will close the report and the Print Preview menu.
First Page / Last Page will allow you to go to the end of the report and back to the beginning.
4) Asset Management Reports
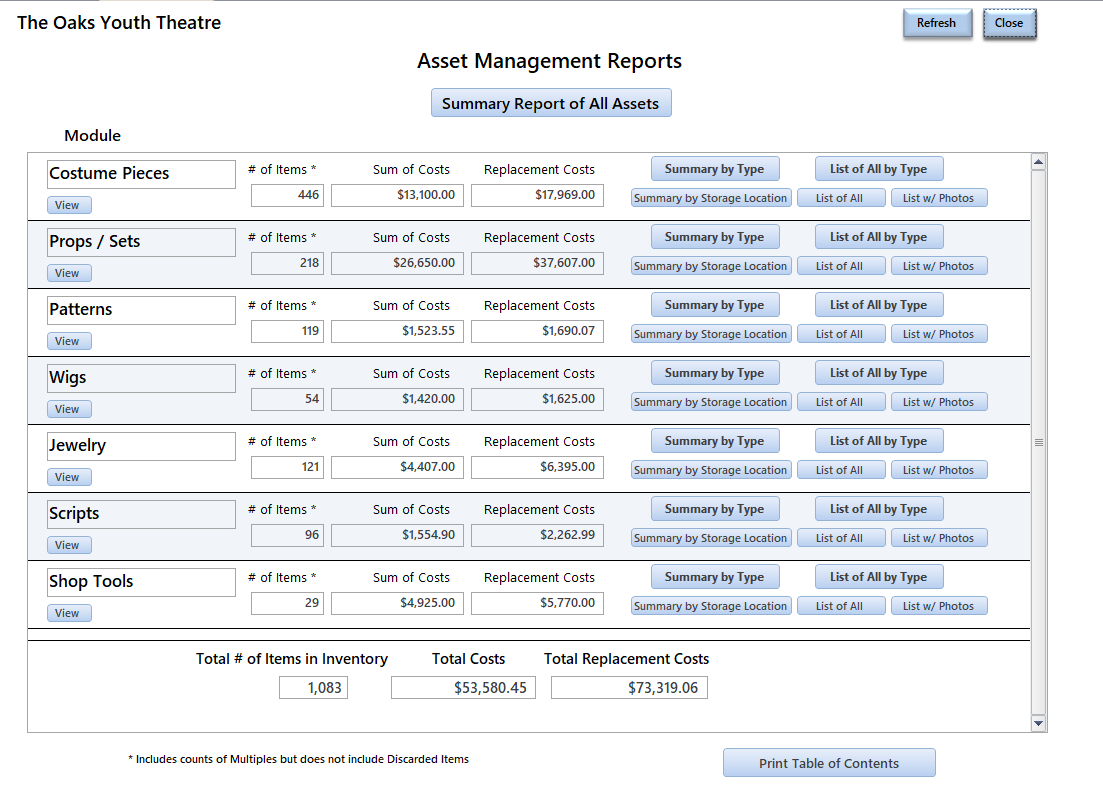
In response to many customers being asked by their administrators to provide a detailed or summary report of the assets in their theatre - we added the Asset Management Reports form and reports.
From the Main Menu and the Reports Menu you can open the Asset Management Reports form. It will list all the current modules (Costume Pieces, Props/Sets, etc), the number of items in inventory (that are not marked as discarded), the sum of the Costs/Value of the items and the sum of the Replacement Costs. There is a summary report for all modules and 5 types of reports for each module.
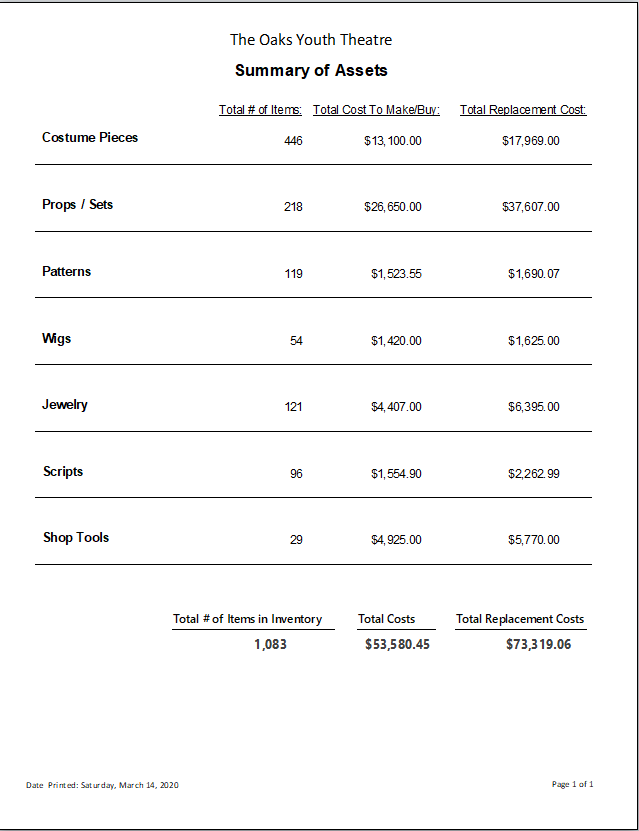
Summary of all Assets.
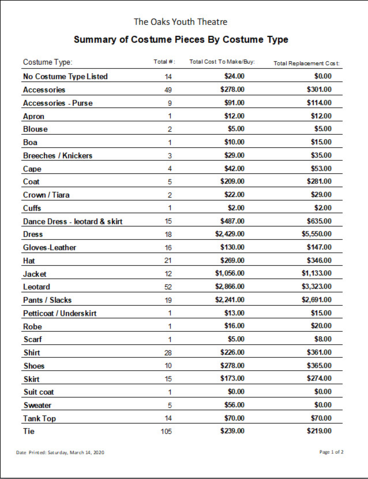
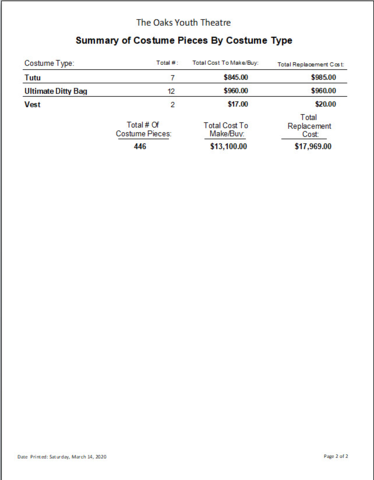
Example of a Costume Pieces report - Summary by Costume Type - pages 1 and 2.
You can print a Table of Contents from the main Asset Management screen as well if you want to create a binder with all the reports.
5) Behind the scenes updates to allow for more tabs to be open at the same time.
In earlier versions of the Theatre Inventory Database you could only have a few tabs/forms open at one time. This was due to a limitation of the number of tables or queries that could be called at one time. I have made modifications to the internal workings of the forms to reduce the number of tables and queries called at one time so it allows for more tabs/forms to be open at once. You will still have to be careful of opening more than 5 tabs/forms but you should see a big improvement in the performance.
6) New fields for Performer Measurements
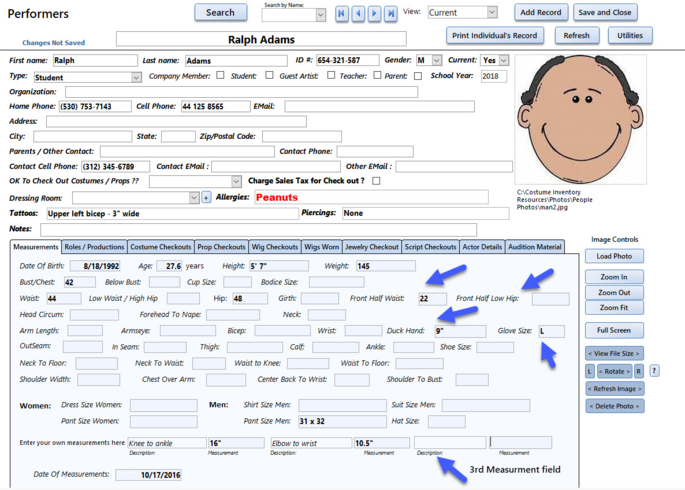
At the request of a few customers I have added a few new fields to the performer measurement list:
Duck Hand - The measurement around the hand when you hold your fingers together to make a 'duck'.
Glove size - Glove size.
Front Half Waist - This is a measurement of the waist from one side around the front to the other size (not including the back). For performers who have a little more bulk in the front than all around.
Front Halt Low Hip - Another measurement from side to side a the low hip position.
Shoulder To Bust - This is a measurement from the top of the shoulder to the point of the bust.
Other Measurement 3 - a blank field you can name anything you want and enter a value.
7. Update Rental Fee for Costume Pieces by Costume Type
You may update the Rental Fees for all Costume Pieces by selecting the Costume Type and entering the Rental Fee. You can select to update all records for the selected Costume Type or just those who have a Rental Fee of $0 or the Rental Fee fields is empty.
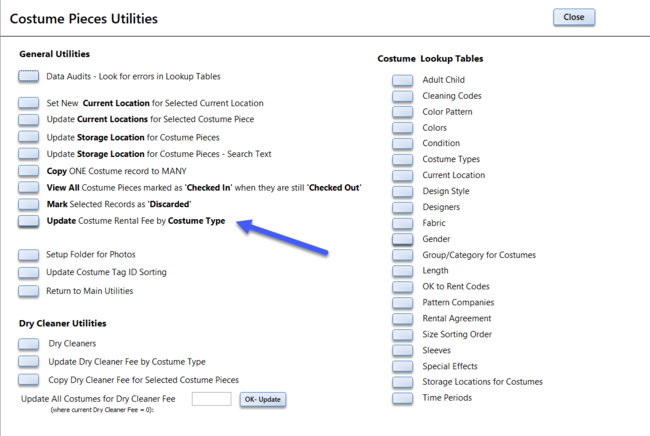
Go to the Costume Pieces Utilities menu.
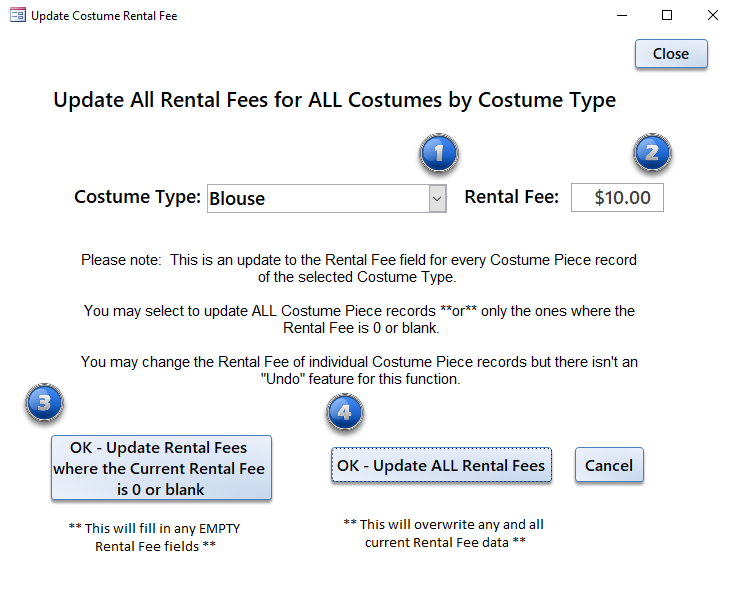
1) Select the Costume Type you wish to update.
2) Enter the rental fee.
3) Select this option to only update the records with a 0 or empty Rental Fee value. All records with a rental fee entered will be ignored.
4) Select this option to update ALL Costume Piece records regardless if there is a Rental Fee value entered. Any existing values will be overwritten.
8. Checkout-Rental forms updated with Customer Sales Tax rate
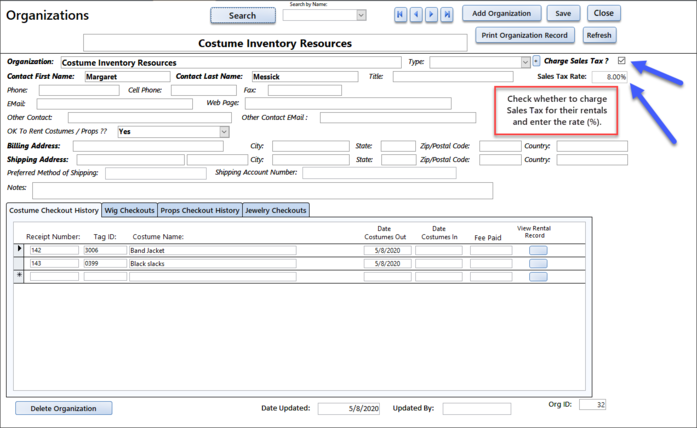
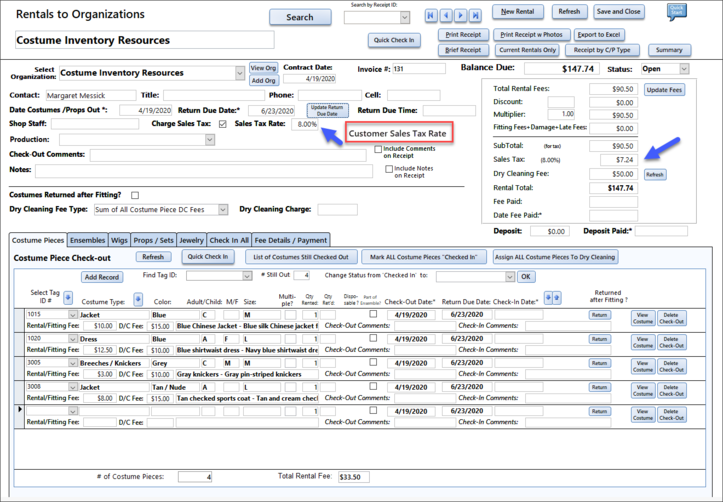
If you do rentals for organizations that have a different Sales Tax Rate (percent) than you normally charge, you can set that Sales Tax Rate on the Organization screen. When you create a rental, that Sales Tax Rate will be used to calculate the sales tax for that rental.
Step 1 - Update the Organization record to include the Sales Tax Rate:
Step 2 - Verify the Sales tax rate on the Rentals form:
9. Props/Sets Rental Package feature updated
The Props/Sets rental package has been updated to have a report with photos for each Rental Package plus the Checkout/Rental module has been updated to ask about renting an entire package. See the Rental Package section of the User Guide here.