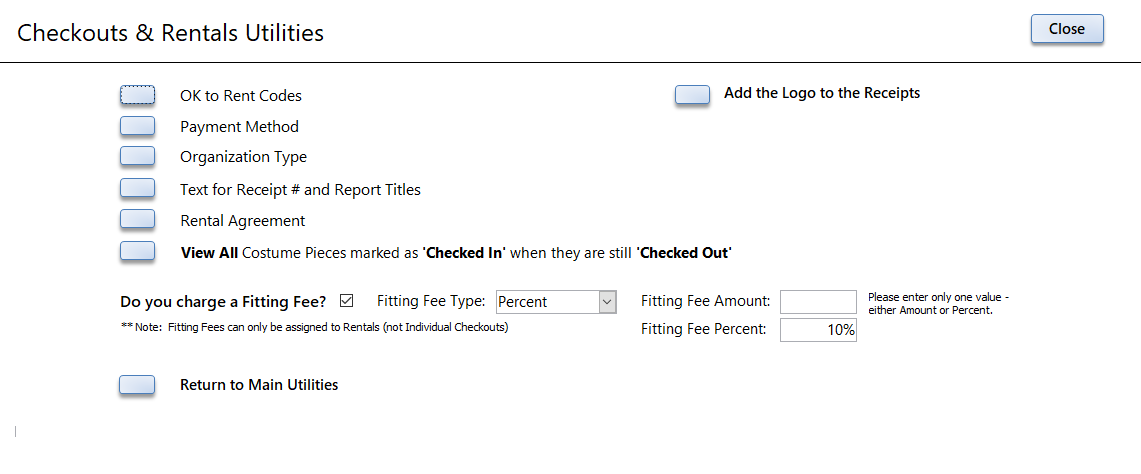
1) OK to Rent Codes - if you wish to add a note to an Individual's or Organization's record on whether they can rent items - you can select it here.
2) Payment methods - a list of choices for how a customer pays for the rental.
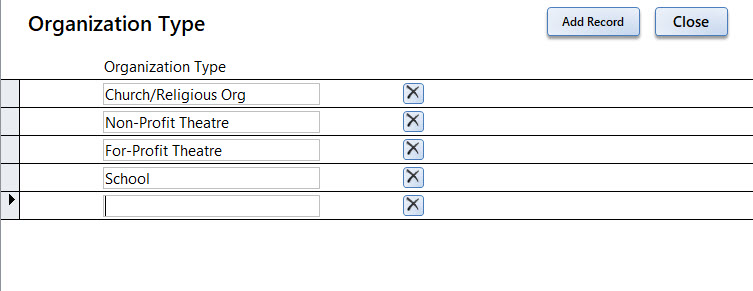
3) Organization Type - You can identify the Organization Type (Non-profit, Church, For-Profit Theatre, etc).
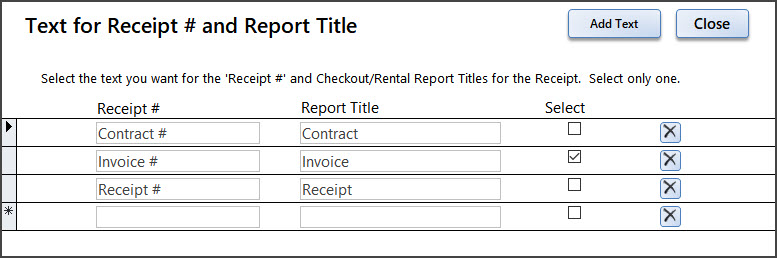
4) Text for Receipt Number and Report Titles- If you don't like to use the word "Receipt" on the Checkout / Rental screens and the receipts - you can change it to anything you want. You may edit the text in the Receipt # and Report Title fields. Just be sure to only Select one option.
The words "Invoice" below - those titles are taken from the selection above.
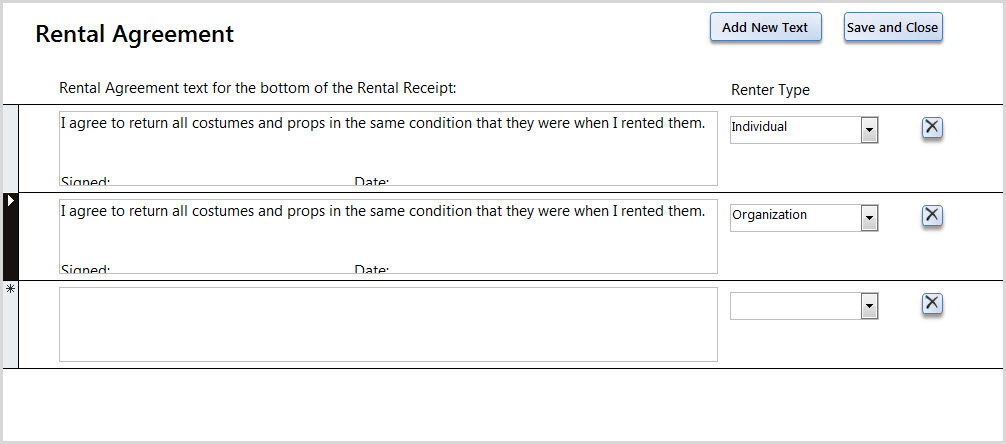
5) Rental Agreement - if you want to have a statement at the bottom of the receipt where a customer will sign to acknowledge responsibility for the care of the items rented - you can edit the text here. If you do not want any text at the bottom of the receipt - delete the agreement record with the

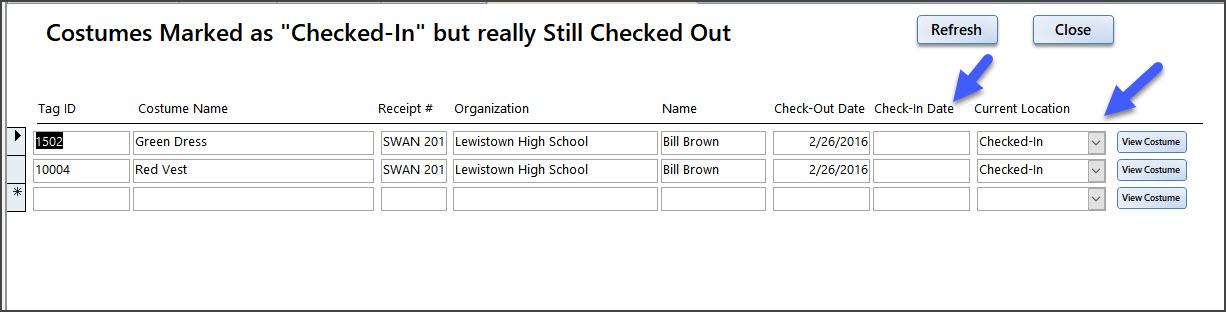
6) View All Costumes marked as Checked In when they are still Checked Out.
Sometimes the Current Location can be updated incorrectly (especially if you are checking in a lot of costumes very, very quickly with the barcode scanner. It doesn't happen often but if it does this is a quick way to fix it.)
You can see these two costumes are marked as "Checked In" but have no Check-in Date. To fix it - just select "Checked Out" from the drop down list for Current Location.
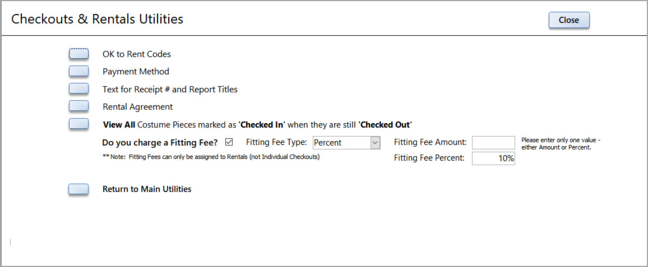
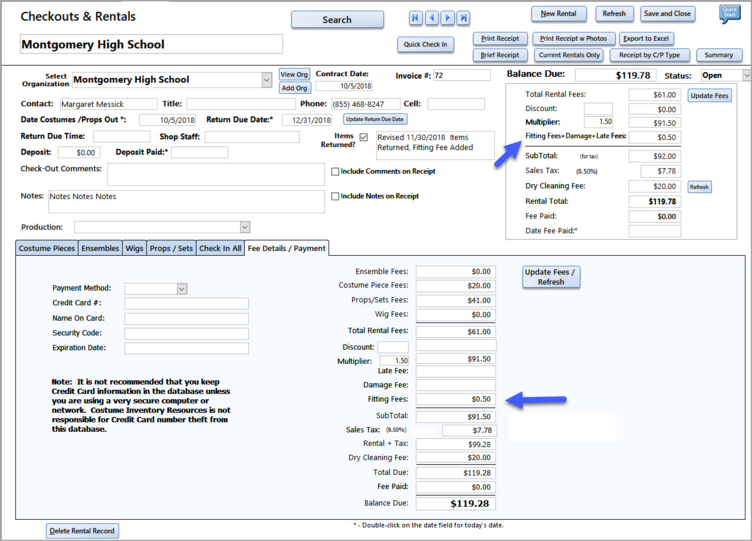
7) Fitting Fee:
To turn on the Fitting Fee feature - check the box next to "Do you charge a Fitting Fee?". Select the Fitting Fee type (Percent or Amount). Enter in the fee (either the amount or the percent).
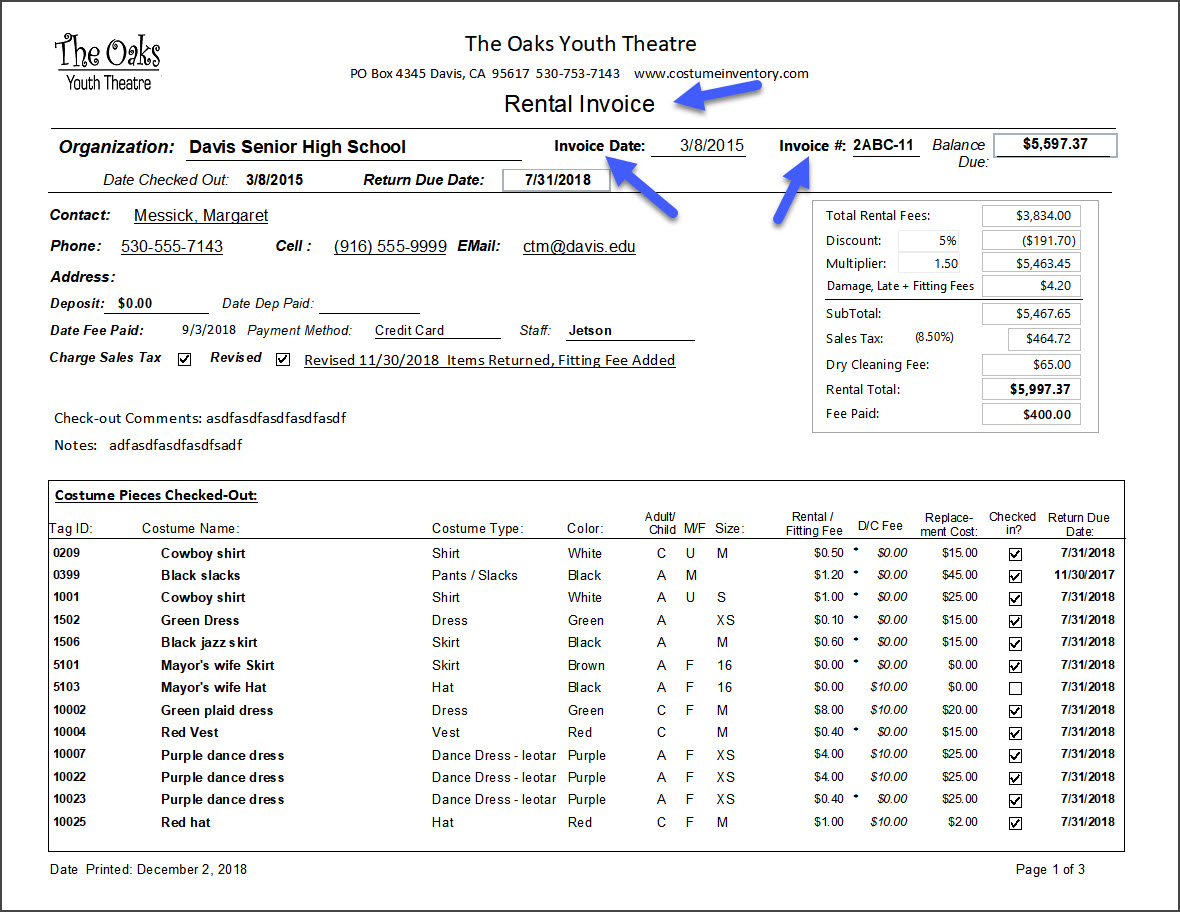
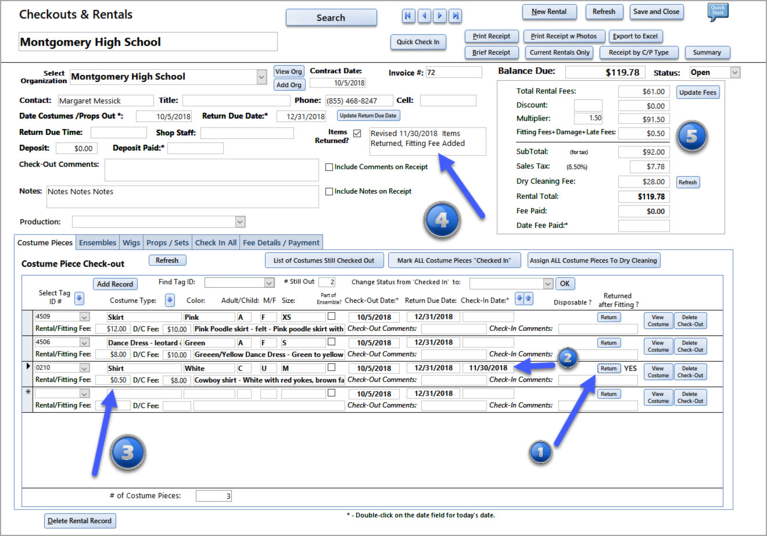
On the Rentals screen you will see a new button called "Return". When an item is returned, click on the Return button and 5 things happen:
1) Next to the Return button the word "YES" appears to show that it was returned.
2) The Item is 'checked in'.
3) The Rental Fee (on the Costume listing) is updated to the Fitting Fee
4) A note is added to say that some items were returned.
5) The Total Rental Fees is adjusted to reflect just the items checked out (not returned). The Fitting Fee is added in the "Fitting Fees+Damage+Late Fees" section. Note: on this example there are Props checked out as well. To see the Fees breakdown look at the Fee Details/Payment tab (below).
To see the Fitting Fees you can look at the top Fees summary or the tab for 'Fee Details / Payment'.
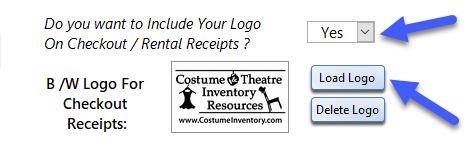
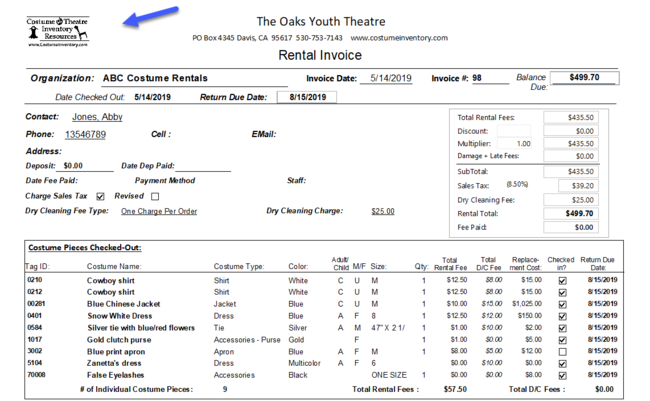
8) Add logo to Receipts/Invoices. From the Company Setup screen (Main Menu / Utilities / Company Setup) you can add a black and white logo to the upper left corner of your receipts.
Add the logo from the Company Setup screen. Be sure to click on "Yes" for "Do you want to Include Your Logo on Checkout/Rental Receipts ?"