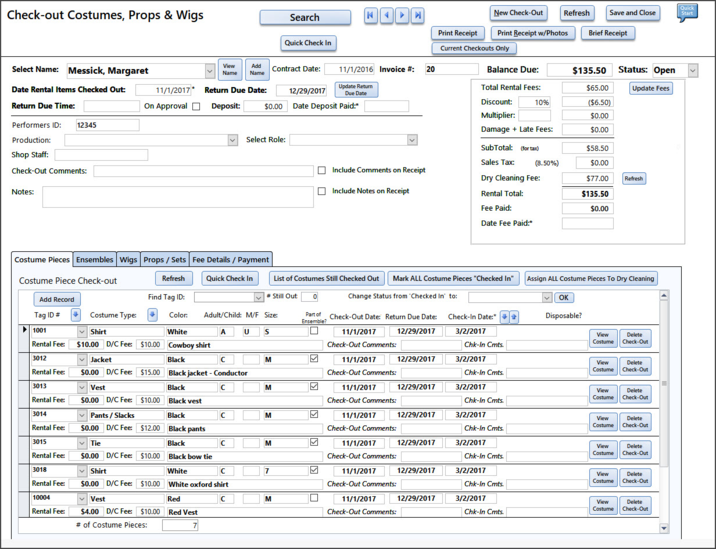
Check-out for Individuals
Check-out for Individuals is designed for checking out Costumes, Props, and Wigs to individuals - students, performers, members of your theatre family, etc.
Fields on the Check-out Record:
1) New Check-out - Create a new Check-out Record
2) Select Individual - click on the Drop-down list to select a person off the Performer/Individual list. If the person you want is not on that list - click on the
Add Member/Name button.
3) Receipt # - Enter a number for the Receipt - or accept the number that appears.
4) If a performer is checking out costumes or props for a Production (that is in the Productions section of the database) you can select the Production name and Role off the drop-down lists.
5) Enter the Return Due Date - this is important to enter so that you can check for items that are Overdue (see Reports).
6) Costume Pieces - Each costume piece that is being checked out needs to be selected from the list. You can enter the data in 3 ways: Select the number from the Drop-down list, Type the number in or Scan the tag's barcode and have the scanner write the number for you. Only items that are not currently checked out will show up on the list. The Rental Fees (from the Costume Piece screen) will be added to the Rental Fees field.
7) Ensembles - You can select an Ensemble off the list of Ensembles and all the Costume Pieces associated with it will be added to the Costume Pieces tab.
8) Props/Sets - Each Prop/Set item that is being checked out needs to be selected from the list. You can enter the data in 3 ways: Select the number from the Drop-down list, Type the number in or Scan the tag's barcode and have the scanner write the number for you. Only items that are not currently checked out will show up on the list. The Rental Fees (from the Props/Sets screen) will be added to the Rental Fees field.
9) Update Fees - If you update the Rental Fee for a particular piece - you can recalculate the Rental Fees by clicking on the "Update Fee" button.
10) Payment Details - this tab shows all the details of the fees charged for the rentals and the payments made.
11) Balance Due - This is the amount the person checking out the items owes.
12) Discount - if you want to apply a percentage discount to the total rental - enter the % discount here.
13) Sales Tax - Sales Tax can be applied to the order if it is required by your state. The Sales Tax % is stored on the
Company Information screen.
14) Rental Total - the total amount calculated from the Rental Fees minus any discount plus the Sales Tax.
15) Fees paid - Enter the amount the person checking out the items has paid.
16) Date Fees Paid - Enter the date when they paid.
17) If your shop requires a Deposit - enter the value paid for the deposit here.
18) This is the Date the Deposit was paid.
19) Late Fee and Damage/Cleaning Fees - if you charge Late Fees and Damage and Cleaning Fees - enter those values here. The Amount Due will need to be recalculated after the amounts are added. Click the "Update Fee" button to recalculate.
20) Include Comments and Notes on Receipts. You can add comments about the condition of the items returned or general notes in these fields. If you want those comments to print on the receipt - check the boxes next to the fields.
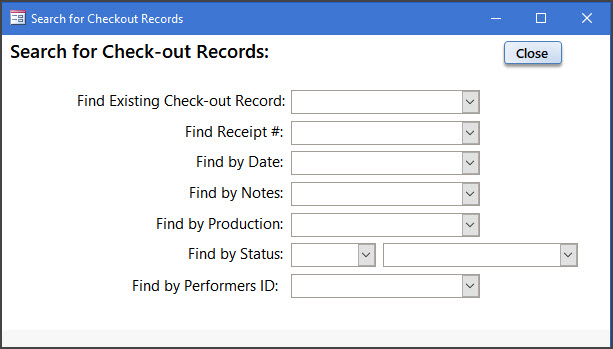
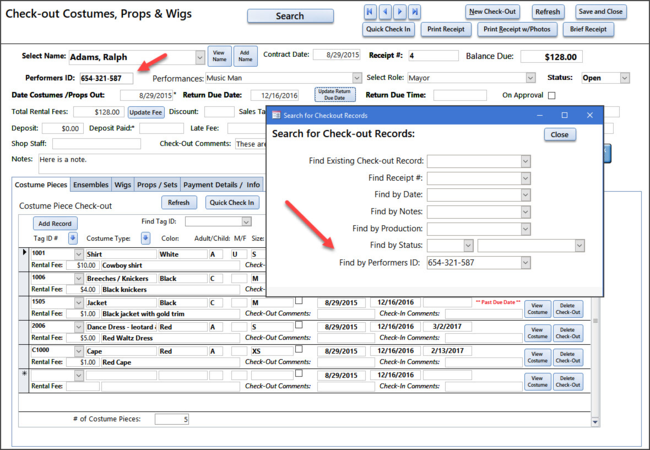
21) Search - find a Check-out record by the person's name, by the Receipt number and many other fields.
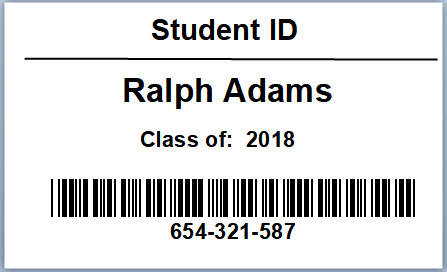
The Checkout Records can be searched by Student ID. For example: If their Student ID is entered in their Performer Record - and - they have a Student ID that has a Barcode on it you can do a put your cursor in the Find By Performer ID box, scan the Student ID barcode and find their Checkout Record.